Ingredients
Equipment
Method
Prepare Your Workspace
- First, preheat your oven to 250 degrees Fahrenheit (120 degrees Celsius). This optimal temperature is crucial for the slow, even melting of your hard candy without excessive bubbling, ensuring a clear and smooth finish.
Sort and Crush the Candy
- Unwrap the Jolly Ranchers. Place each flavor in a separate sandwich bag and seal it securely. This step helps maintain distinct colors for your stained-glass effect.
- Use a rolling pin to crush the Jolly Ranchers inside the sandwich bags into smaller pieces. Crushing the candy into a fine powder or small shards is critical because it allows the sugar to flow into narrow mold details and helps prevent unsightly air pockets.
Fill the Molds
- Place your Easter silicone molds on a baking sheet. Always place your molds on a rigid baking sheet before filling to prevent spills and make transferring them to the oven much easier.
- Use a spoon to scoop the crushed Jolly Ranchers into the silicone molds. Be careful not to overfill them.
Bake and Swirl
- Bake the Jolly Ranchers for 5-10 minutes or until fully melted. Watch them carefully; the candy should appear fully liquid and glossy, but not bubbling excessively.
- Carefully remove the baking sheet from the oven. If you desire the beautiful 'Stained-Glass Marble Swirl' effect, gently use a toothpick to swirl the molten sugar in the molds for about 1-2 minutes. Strategically mix two complementary colors, for example, pink and white, or blue and yellow, if you layered them. Then, let cool to room temperature.
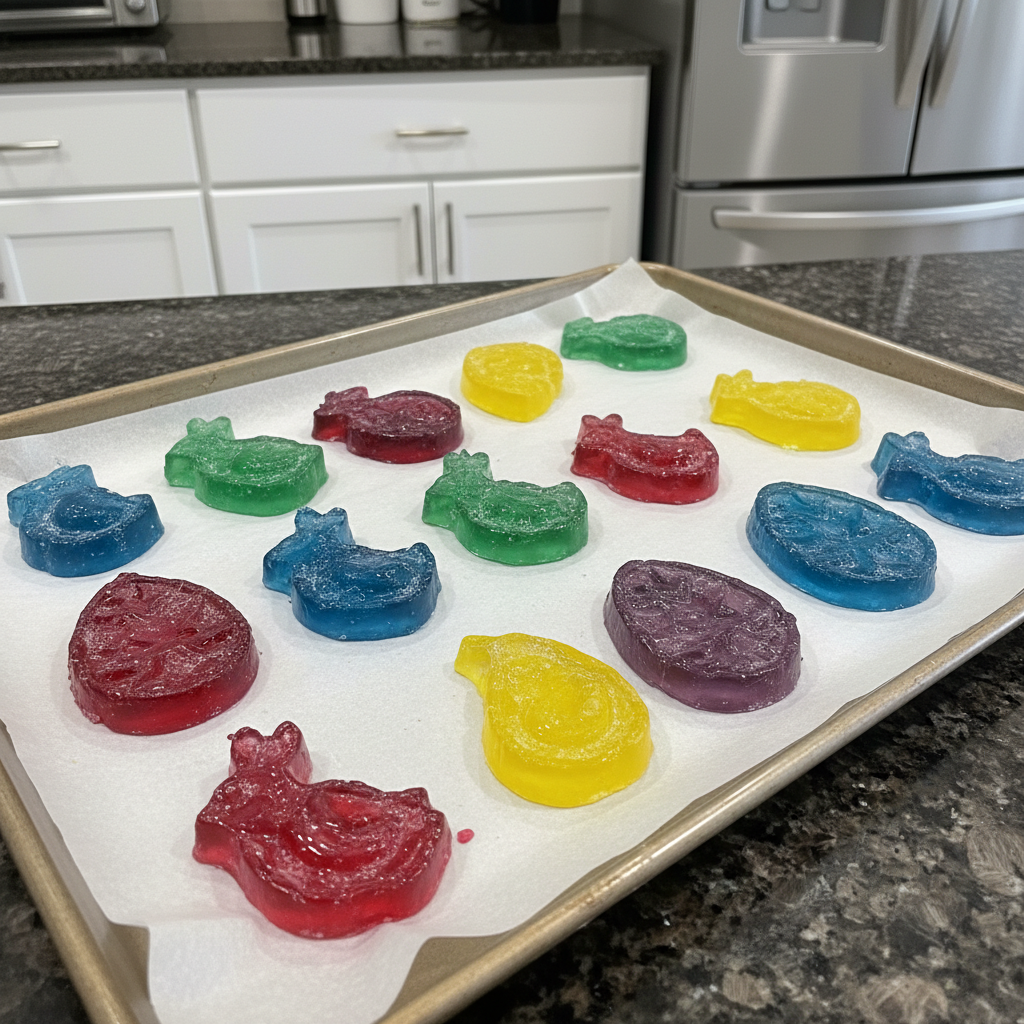
Cool and Demold
- Remove them from the oven and let cool completely to room temperature. Allow at least 20-30 minutes for thinner molds, and up to an hour or more for thicker ones, to ensure they are fully set.
- Gently flex the silicone molds to release your vibrant, glass-like candies without breaking them. Admire their crunchy texture and sparkling appearance.
Nutrition
Notes
Pro Tips: For perfect details, crush hard candy into a fine powder to ensure sugar flows into narrow mold details. Always place silicone molds on a rigid baking sheet before filling to prevent spills and aid in even heat distribution. Sort hard candies by flavor before crushing to maintain vibrant, distinct colors, especially for the Stained-Glass Marble Swirl effect. To execute the unique twist perfectly, use a very thin toothpick and swirl gently for only 1-2 minutes to create distinct marbling without fully blending colors. Experiment with inclusions like edible glitter or layering colors for an ombre effect.
Common Mistakes to Avoid: Never place whole candies into detailed molds; always crush them first to prevent air pockets and incomplete shapes. Avoid overbaking at high temperatures, which causes excessive bubbling and a cloudy texture. Do not demold before candies are completely cooled to room temperature, as this will result in deformation and stickiness. Always start with sparkling clean molds to avoid imparting off-flavors or affecting surface texture.
Serving & Storage: These delightful candies make perfect Easter basket stuffers, cupcake toppers, drink garnishes, or edible decor. To prevent stickiness, store cooled, set candies in airtight containers. For best results, include food-grade desiccant packs to absorb excess moisture. When stored correctly in an airtight, low-humidity environment, your homemade hard candies can last for several weeks. Avoid refrigerating them. These candies are perfect for making ahead of time for your Easter celebrations.
Nutrition information is estimated based on common ingredients and serving sizes and may vary.