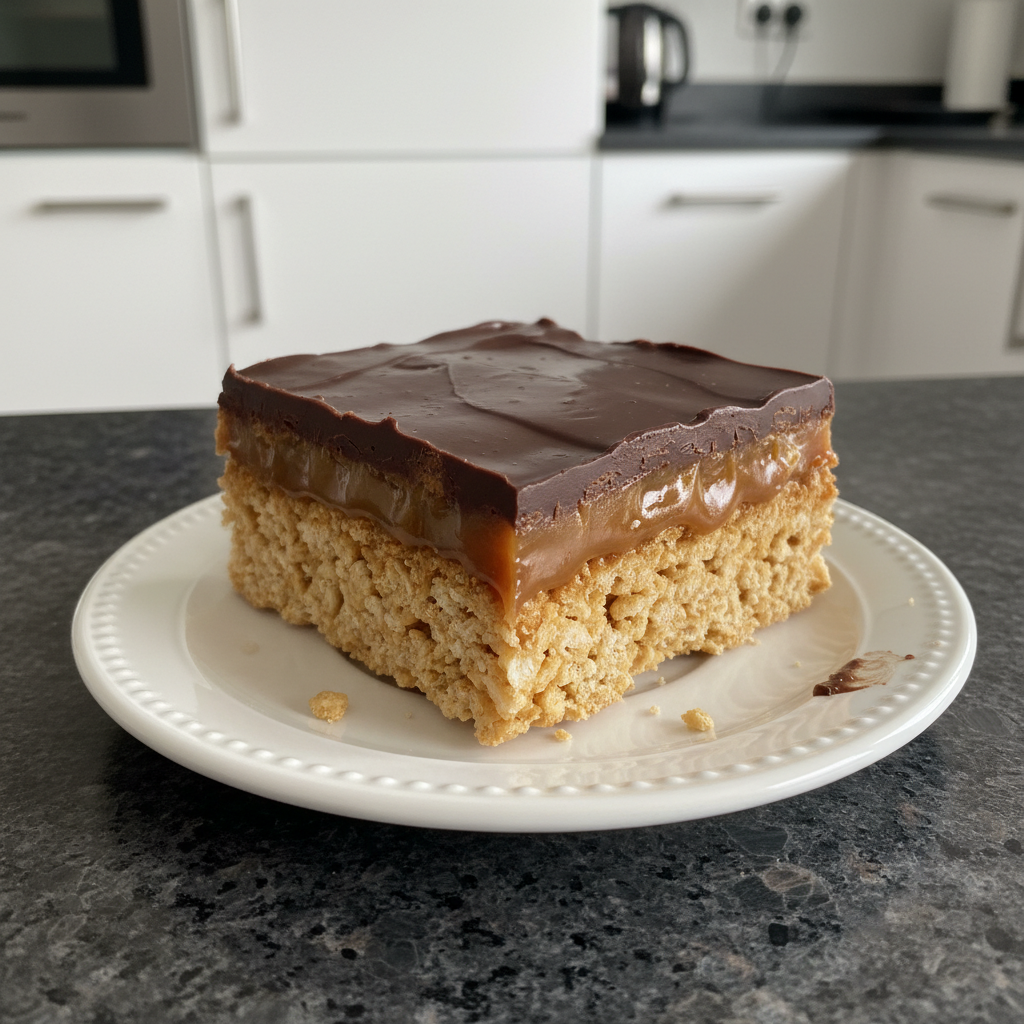
There’s something truly magical about bringing together two beloved dessert classics. In my kitchen, I’ve perfected a recipe that marries the nostalgic comfort of Rice Krispy Treats with the sophisticated indulgence of Millionaires Shortbread. Get ready to discover the ultimate Rice Krispy Millionaires Bars. This recipe isn’t just about mixing ingredients; it’s about crafting layers of irresistible texture and flavor, promising both a delicious outcome and practical tips for success. I am confident you will create a superior version of this classic dessert, perfect for any occasion.
Why You’ll Love This Recipe
I am so excited to share what makes my Rice Krispy Millionaires Bars truly stand out.
My first unique twist involves lightly toasting the Rice Krispies cereal before you even start mixing. This simple step is a game-changer. It enhances the cereal’s flavor by developing a subtle nutty, malted taste. More importantly, it significantly boosts crispness thanks to the Maillard reaction, providing a more complex and satisfying base texture.
Next, I always sprinkle a pinch of flaky sea salt over the warm caramel layer. This isn’t just for show; it’s crucial food science. The sea salt provides a vital contrast, expertly cutting through the sweetness of both the rich caramel and the decadent chocolate. This balance elevates the overall flavor profile, activating more taste receptors for a sophisticated salted caramel effect that truly shines.
The resulting bars offer an unbeatable balance of crunchy, chewy, and smooth textures in every bite. They boast a sophisticated flavor profile that truly sets them apart from typical sweet treats. And the best part? These impressive dessert bars are surprisingly easy to make, yet they look absolutely stunning, making them perfect for family, friends, or any gathering.
Ingredients Needed

Here are the precise ingredients you will need to create these delightful Rice Krispy Millionaires Bars.
- 300 g mini marshmallows
- 50 g unsalted butter
- 1 tablespoon vanilla extract
- 1/4 teaspoon salt
- 120 g rice krispies
- 100 g unsalted butter
- 1 tin condensed milk (around 397g)
- 120 g granulated sugar
- 50 g golden syrup
- 1/2 teaspoon salt
- 200 g chocolate (I used dark chocolate but any works)
- 1 tablespoon vegetable oil
Ingredient Notes & Substitutions
Let’s talk a little more about these key ingredients and how they contribute to our delicious Rice Krispy Millionires Bars.
Mini Marshmallows: I recommend using mini marshmallows because they melt much more smoothly and evenly than larger ones, creating a better Rice Krispy Treats base. If you only have large marshmallows, you can cut them into smaller pieces to help them melt faster.
Unsalted Butter: Using unsalted butter gives you complete control over the salt content in your recipe. If you only have salted butter, you can certainly use it; just be sure to reduce the amount of added salt in both the Rice Krispie layer and the caramel layer by about half a teaspoon.
Golden syrup gives the caramel a unique richness and chewy texture. If you can’t find it, a good substitute is light corn syrup. This will provide a similar texture to the caramel layer, although the flavor might be slightly different.
Chocolate: For the chocolate topping, I always suggest using a good quality dark chocolate. This helps to balance the sweetness of the caramel and Rice Krispy layers, creating a more sophisticated dessert. Milk chocolate or even white chocolate can be used if you prefer a sweeter bar, but dark chocolate offers the best contrast and depth of flavor.
Vegetable Oil: The tablespoon of flavorless vegetable oil, like canola or sunflower oil, added to the chocolate is a small but mighty secret. It helps the chocolate melt smoothly and, crucially, prevents it from cracking when you cut into the bars, ensuring beautiful, clean slices.
Vanilla Extract: While I specify vanilla extract, if you have vanilla bean paste on hand, it makes a wonderful substitution, adding even more intense vanilla flavor and those beautiful little flecks.

How to Make Rice Krispy Millionaires Bars
Let’s walk through the process of creating these exquisite Millionaires Rice Krispy Bars, step by step.
Preparation
First, prepare your 8-inch square cake tin. Grease it thoroughly and line it with parchment paper, leaving an overhang on two sides. This will make it much easier to lift the set bars out later. Set this aside for now.
Making the Rice Krispie Layer
Before we even touch the marshmallows, let’s unlock the secret to an incredibly crisp and flavorful base. Spread your 120g of rice krispies onto a baking sheet. Lightly toast them in a preheated oven at 300°F (150°C) for about 5-7 minutes, until they are just fragrant and have a very subtle golden hue. Keep a close eye on them to prevent burning. This toasting step brings out a beautiful nutty, malted flavor and enhances the crispness through the Maillard reaction, making your Rice Krispy Treats truly exceptional. Allow them to cool slightly.
In a large pot, add your 300g mini marshmallows, 50g unsalted butter, 1 tablespoon vanilla extract, and 1/4 teaspoon salt. Place this pot over medium heat on your stovetop.
Heat this mixture, stirring constantly, until all the marshmallows and butter have completely melted together, creating a smooth, glossy, and cohesive marshmallow mixture. It should be entirely liquid with no lumps.
Remove the pot from the heat. Gently fold in your now lightly toasted Rice Krispies, mixing until they are fully coated in the marshmallow mixture.
Carefully transfer this mixture into your prepared 8-inch square cake tin. To achieve a flat, even layer without too much stickiness, lightly wet your hands with water. Then, gently but firmly press the Rice Krispie mixture down into the tin. Try not to over-compress it, as this can lead to a hard base. Set this aside while we prepare the caramel layer.
Making the Caramel Layer
Now, for the star of the show: the silky caramel. In a large, heavy-bottomed pot, combine all the ingredients for the caramel: 100g unsalted butter, 1 tin (around 397g) condensed milk, 120g granulated sugar, 50g golden syrup, and 1/2 teaspoon salt.
Place this pot onto medium heat. This next part is crucial: you must stir constantly. Do not walk away from the pot, as caramel can burn very quickly and easily. Continue stirring, scraping the bottom and sides of the pot, until the caramel mixture thickens and turns a beautiful light amber colour. This usually takes about 8-12 minutes, depending on your stovetop and pot. The caramel will be bubbling gently, and you’ll notice a distinct color change and a rich aroma. Cooking it to this specific color ensures a perfectly chewy, not overly hard, caramel.
Once the caramel reaches that perfect light amber color, immediately remove it from the heat. Pour this warm, glossy caramel evenly over your Rice Krispie layer in the tin. Gently spread it out to cover the entire surface.
Transfer the tin to your fridge. Allow it to chill for about 20 minutes. This gives the caramel a chance to cool down and set up slightly before we add the final layer, preventing the chocolate from sinking in or mixing with the caramel.
The Chocolate Layer
In a microwave-safe bowl, combine your 200g chocolate (dark chocolate is my preference for balance) and 1 tablespoon vegetable oil. Melt this in your microwave in 30-second intervals, stirring well after each, until the chocolate is smooth and completely melted. Alternatively, you can use a double boiler method for a gentler melt, ensuring the chocolate doesn’t seize or burn.
Carefully pour the melted chocolate over the slightly set caramel layer. Use an offset spatula or the back of a spoon to smooth it out evenly, creating a beautiful, glossy topping.
Place the entire tin back into the fridge. Allow it to chill for at least an hour, or until the chocolate is fully set and firm to the touch. This chilling time is essential for clean cuts.
While the bars do set up beautifully in the fridge, I find they taste much better at room temperature. Once they have thoroughly set, let them sit out on the counter for about 15-20 minutes to soften slightly before cutting. Then, use a sharp, warm knife to slice them into your desired size and enjoy!
Beyond the Recipe: Perfecting Your Millionaires Bars
Achieving bakery-worthy Millionaires Bars is all about paying attention to a few key details.
Achieving Perfect Layers & Clean Cuts
Choosing the right tin size is important for beautiful layers. For this recipe, an 8-inch square cake tin with sides that are at least 2 inches deep is ideal. This depth ensures each of the three distinct layers has enough room to be substantial and visually appealing.
This recipe yields approximately 16 generously sized bars when cut into a 4×4 grid. However, you can easily cut them into smaller, bite-sized squares to serve more people, perfect for parties or sharing platters.
For perfectly clean, professional-looking cuts on your finished bars, follow these steps. First, ensure the bars are thoroughly chilled in the fridge for at least an hour. Before making your final cuts, lightly score the chocolate layer with a sharp knife to guide your lines. Then, warm a sharp knife under hot water, wipe it completely dry, and make your cuts. Re-warm and clean the knife after every one or two slices for the neatest results. This prevents the chocolate from cracking and gives you those beautiful, defined layers.
Troubleshooting Common Millionaires Bar Woes
Even seasoned bakers encounter challenges. Here’s how to tackle common issues with these bars.
If your caramel is not setting firmly, it’s usually due to being undercooked. The caramel needs to reach that specific light amber color and thickened consistency to set properly. Not enough chilling time can also be a culprit; ensure it gets at least 20 minutes in the fridge before the chocolate layer is added, and then an hour for the final set.
To prevent chocolate cracking when you cut your bars, remember the secret ingredient: a tablespoon of flavorless vegetable oil mixed into the melted chocolate. Also, ensure your chocolate is melted smoothly and not overheated. Allowing the bars to come to room temperature for a few minutes before cutting with a hot, dry knife also helps.
A soggy Rice Krispie base can happen if moisture gets trapped or if the caramel hasn’t properly set. Make sure your caramel layer is firm enough before adding the chocolate. Proper chilling of each layer is essential to maintain the integrity of the base.
If your Rice Krispie treats get hard and unpleasantly chewy, it’s often because the base was over-compressed when pressing it into the tin. Press firmly but gently. Another reason can be overcooking the marshmallow mixture; just melt it until smooth, don’t let it bubble or cook beyond that point.
Pro Tips & Troubleshooting
Here are my golden rules for making these Rice Krispy Millionaires Bars an absolute triumph every time.
Pro Tips for Success
Toast the Rice Krispies: This truly is a game-changer. Lightly toasting the cereal before mixing enhances its flavor with nutty, malted notes and ensures an extra-crispy base. Do not skip this unique step for superior texture and taste.
Flaky Sea Salt Magic: Always sprinkle a pinch of flaky sea salt over the warm caramel layer. It provides a crucial contrast, cutting through the sweetness and elevating the overall flavor profile to a sophisticated salted caramel experience.
Mini Marshmallow Advantage: Opt for mini marshmallows over large ones. They melt more quickly and evenly, giving you a smoother, more consistent Rice Krispie base without lumps.
Caramel Control: When making the caramel, keep the heat at medium-low and stir constantly. This prevents burning and helps you achieve that perfect light amber color and chewy consistency. Don’t walk away from the pot!
Chocolate Choice: For the chocolate topping, I strongly advocate for dark chocolate. Its slight bitterness perfectly balances the sweetness of the caramel and marshmallow, creating a more harmonious dessert.
Oil for Smooth Cuts: Don’t forget that tablespoon of flavorless vegetable oil when melting your chocolate. It makes the chocolate layer easier to cut and prevents it from cracking, giving you pristine slices.
Pressing the Base: When pressing the Rice Krispie layer into the tin, use slightly wet hands. Press firmly enough to create an even layer, but avoid over-compressing, which can make the base too dense and hard.
Common Mistakes to Avoid
Leaving Caramel Unattended: Never walk away from your caramel as it cooks. It can go from perfect to burned in seconds, resulting in a bitter, unusable layer. Constant stirring is key.
Overcooking Caramel: Cooking the caramel for too long will make it overly hard and brittle once set, instead of delightfully chewy. Aim for that specific light amber color, not a deep brown.
Using Overly Sweet Chocolate: While personal preference plays a role, using milk or white chocolate can make the overall dessert excessively sweet. Dark chocolate provides the much-needed balance.
Forgetting the Flaky Salt: Omitting the flaky sea salt on the caramel means you’re missing out on a critical flavor enhancer and the sophistication of salted caramel.
Skipping the Toasting Step: While not traditional, skipping the toasting of the Rice Krispies means you miss out on a significant boost in flavor and crispness that truly elevates these bars.
Not Chilling Layers Properly: Rushing the chilling process for each layer can lead to messy, mixed layers or a difficult time cutting the bars cleanly. Patience here yields beautiful results.
Serving & Storage
These Millionaires Rice Krispy Bars are best enjoyed with a little planning for perfect presentation and taste.
Serving Ideas
These bars truly taste much better at room temperature. After they have fully set in the fridge, let them sit out on the counter for about 15-20 minutes before cutting and serving. This allows the layers to soften slightly, improving the texture and flavor of the caramel and chocolate.
I recommend cutting them into individual squares or bars. This makes them easy to portion and perfect for a dessert platter or bake sale. You can even cut them smaller for bite-sized treats.
For a touch of elegance, consider a simple garnish. An extra sprinkle of flaky sea salt on top of the chocolate layer enhances the salted caramel experience, or a light dusting of cocoa powder can add a sophisticated finish.
These rich, sweet treats pair wonderfully with a hot cup of coffee or tea. For a comforting combination, serve them alongside a cold glass of milk. They are also a fantastic addition to any dessert spread.
Storage and Make-Ahead
Once cooled and cut, store your Rice Krispy Millionaires Bars in an airtight container. This keeps them fresh and prevents them from drying out.
For optimal texture, I recommend storing them at room temperature for up to 3-4 days. The caramel remains perfectly chewy and the chocolate soft. If your kitchen is very warm, or for slightly longer storage, you can keep them in the fridge for up to 5-7 days. Just remember to let them come to room temperature for about 15-20 minutes before serving to ensure the best flavor and texture.
These bars are also excellent for making ahead! You can prepare them a day or two in advance of when you plan to serve them, making them perfect for parties, holidays, or meal prep.
You can also freeze Millionaires Rice Krispy Bars. Wrap individual bars tightly in plastic wrap, then place them in an airtight freezer-safe container or bag. They can be frozen for up to 3 months. To thaw, simply remove them from the freezer and let them come to room temperature for an hour or two before enjoying.
Conclusion
I truly believe these Rice Krispy Millionaires Bars are a standout dessert that beautifully combines crispy, chewy, and smooth textures with a sophisticated flavor profile. My unique twists, like toasting the Rice Krispies for enhanced crispness and adding flaky sea salt for that perfect balance, truly elevate this classic treat to something extraordinary.
With the detailed instructions and expert tips I’ve shared, I’m confident that anyone can succeed in making these impressive and incredibly delicious bars. Don’t be shy; dive into your kitchen and give this recipe a try. Experiment with different chocolate choices or perhaps a sprinkle of nuts, and share your delightful creations! For more dessert inspiration, be sure to explore other recipes on my blog.
FAQ
Here are answers to some common questions about making my Rice Krispy Millionaires Bars.
What’s the best chocolate for Millionaires Rice Krispie Treats?
I recommend using dark chocolate. Its slight bitterness provides a wonderful balance to the sweetness of the caramel and marshmallow layers, creating a more sophisticated and less cloyingly sweet dessert.
How do I prevent my caramel layer from burning?
The key is constant stirring over medium-low heat. Never leave the pot unattended. Stir continuously, scraping the bottom and sides, until the caramel reaches a light amber color, typically 8-12 minutes. This steady stirring prevents hot spots and burning.
Can I substitute golden syrup in this recipe?
Yes, you can. If you can’t find golden syrup, light corn syrup is the best substitute. It will provide a similar texture to the caramel, although the flavor might be slightly different.
How do I get clean cuts on my Millionaires Rice Krispie Bars?
Ensure the bars are thoroughly chilled, ideally for at least an hour in the fridge. Before cutting, lightly score the chocolate. Then, use a sharp knife warmed under hot water and wiped dry, cleaning the knife after every one or two cuts. This technique helps prevent cracking and gives you neat slices.
How should I store Millionaires Rice Krispie Treats?
Store them in an airtight container at room temperature for 3-4 days for the best texture. If your home is very warm, or for longer storage up to 5-7 days, you can refrigerate them. Always let them come to room temperature for about 15-20 minutes before serving.
Why do my Rice Krispie treats get hard?
Rice Krispie treats often get hard if the base is over-compressed when pressed into the tin, making it too dense. Overcooking the marshmallow mixture can also cause them to become too stiff. Gently press the base and only melt the marshmallows until smooth, not beyond.
How many servings does this recipe make?
This recipe, using an 8-inch square cake tin, typically yields 16 generously sized bars when cut into a 4×4 grid. You can also cut them into smaller, bite-sized pieces for more servings.
Can I freeze Millionaires Rice Krispie Treats?
Absolutely! Wrap individual bars tightly in plastic wrap, then store them in an airtight freezer-safe container or bag for up to 3 months. Thaw them at room temperature for an hour or two before enjoying.
What is the difference between Millionaires Shortbread and Millionaires Rice Krispie Treats?
Millionaires Shortbread traditionally features a shortbread biscuit base, a layer of soft caramel, and a chocolate topping. Millionaires Rice Krispie Treats substitute the shortbread base with a chewy, crispy Rice Krispie Treat base, keeping the delicious caramel and chocolate layers. My recipe further enhances this by toasting the Rice Krispies for extra flavor and crispness.
Ultimate Rice Krispy Millionaires Bars: Crispy, Chewy, Caramel Perfection
Ingredients
Equipment
Method
- Grease an 8-inch square cake tin thoroughly and line it with parchment paper, leaving an overhang on two sides. Set aside.
- Spread 120g of rice krispies onto a baking sheet. Lightly toast them in a preheated oven at 300°F (150°C) for 5-7 minutes, until fragrant and subtly golden. Watch carefully to prevent burning. Allow to cool slightly.
- In a large pot, combine 300g mini marshmallows, 50g unsalted butter, 1 tablespoon vanilla extract, and 1/4 teaspoon salt. Place over medium heat.
- Heat and stir constantly until all marshmallows and butter are completely melted, creating a smooth, glossy, cohesive mixture.
- Remove the pot from the heat. Gently fold in the lightly toasted Rice Krispies until fully coated.
- Transfer the mixture into the prepared tin. Lightly wet your hands and gently but firmly press the Rice Krispie mixture down into the tin, avoiding over-compression. Set aside.
- In a large, heavy-bottomed pot, combine 100g unsalted butter, 1 tin (around 397g) condensed milk, 120g granulated sugar, 50g golden syrup, and 1/2 teaspoon salt.
- Place over medium heat and stir constantly, scraping the bottom and sides, until the caramel thickens and turns a light amber color (8-12 minutes).
- Immediately remove from heat. Pour the warm caramel evenly over the Rice Krispie layer in the tin and gently spread it out.
- Transfer the tin to the fridge and chill for about 20 minutes to allow the caramel to set slightly.
- In a microwave-safe bowl, combine 200g chocolate and 1 tablespoon vegetable oil. Melt in 30-second intervals in the microwave, stirring after each, until smooth. (Alternatively, use a double boiler).
- Carefully pour the melted chocolate over the slightly set caramel layer. Use an offset spatula or spoon to smooth it out evenly.
- Place the entire tin back into the fridge and chill for at least an hour, or until the chocolate is fully set and firm.
- Once fully set, let the bars sit at room temperature for about 15-20 minutes to soften slightly before cutting. Use a sharp, warm knife to slice into desired sizes.