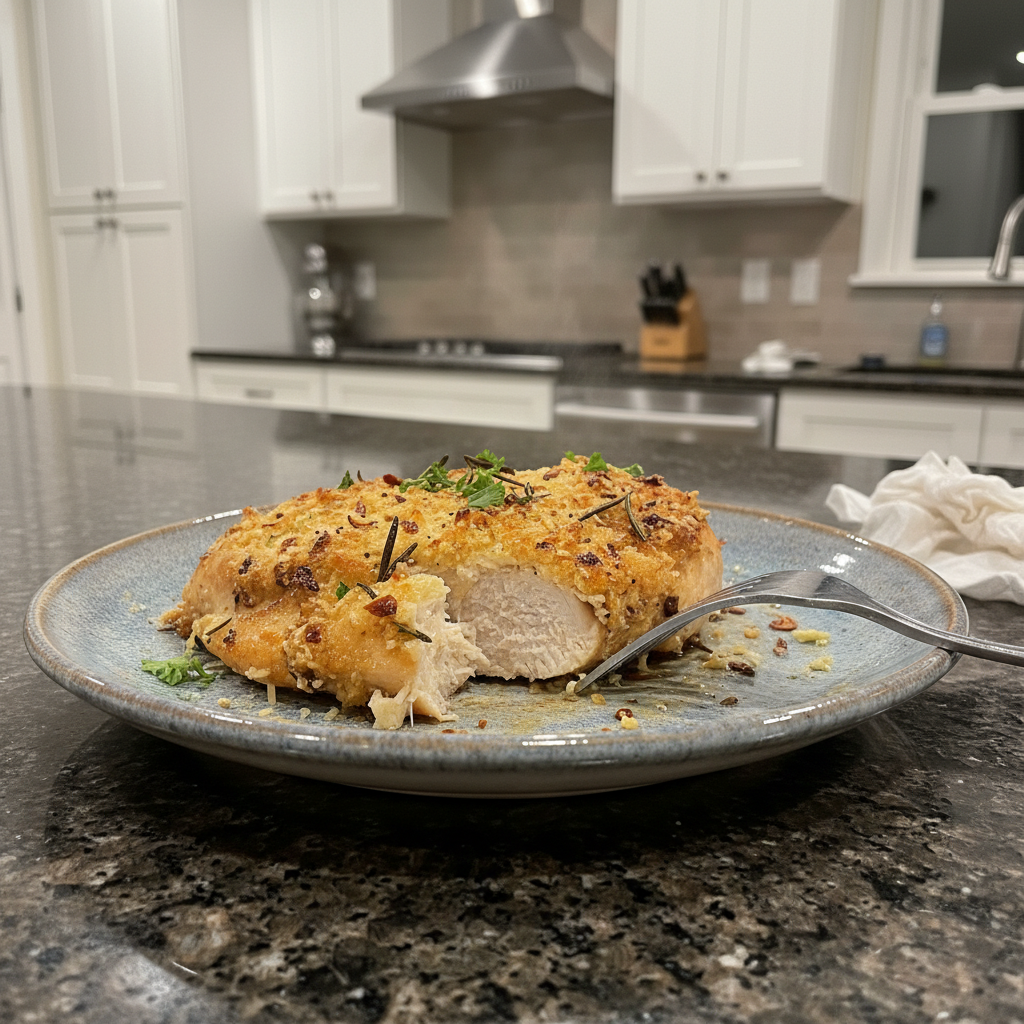
Every home cook dreams of serving chicken that is perfectly tender, incredibly juicy, and bursting with flavor, never dry or bland. I know I do. This recipe for Melt-In-Your-Mouth Chicken isn’t just another chicken dish; it is your new go-to for achieving ultra-tender results every time. I am going to share my secrets for making chicken so buttery and savory it practically melts, crowned with a unique and nutty Panko-Parmesan crisp topping that banishes soggy crusts for good. Get ready to transform your chicken dinner game.
Why You’ll Love This Recipe
This recipe truly shines because of its unique twist: The Panko-Parmesan Crisp Finish. This is not just a simple topping; it is a meticulously crafted layer that solves the common problem of a wet or soggy crust that can plague mayo-baked chicken. I discovered that by folding a small amount of Panko breadcrumbs and a touch of lemon zest into the Parmesan-mayo mixture, something magical happens.
The scientific logic behind this is fascinating. Panko breadcrumbs are specifically designed to be light and airy, allowing them to absorb excess moisture from the mayonnaise as it bakes. This absorption helps prevent the topping from becoming soggy. The grated Parmesan cheese, when exposed to the oven’s heat, undergoes the Maillard reaction, developing those irresistible golden-brown, nutty, and savory notes. Meanwhile, the lemon zest provides a crucial acidic balance, cutting through the richness of the mayonnaise and Parmesan, preventing the dish from feeling too heavy. It creates an emulsified “shingle” that bakes into a distinct textural crunch, perfectly contrasting the ultra-tender chicken beneath.
You will consistently achieve ultra-tender chicken that is incredibly juicy. This recipe offers a satisfying textural contrast between the crisp topping and the moist meat. It is a quick prep, family-friendly meal that is reliable for beginners. This method directly addresses and solves common recipe failures like dry chicken and soggy crusts, ensuring success every time.
Ingredients Needed

- Cooking spray
- 3 (8 oz. each) boneless, skinless chicken breasts
- 1 tsp. salt, divided
- 1 tsp. pepper, divided
- 1/2 tsp. garlic powder
- 1/2 tsp. onion powder
- 1/2 tsp. paprika
- 3/4 cup mayonnaise
- 1/2 cup grated Parmesan cheese
- 1 Tbsp. freshly chopped parsley, for garnish
Ingredient Notes & Substitutions
For the signature Panko-Parmesan Crisp Finish that elevates this Melt-In-Your-Mouth Chicken, I highly recommend adding these two ingredients to your mayonnaise mixture. Include 1/4 cup Panko breadcrumbs to absorb moisture and create that essential crunch. Add 1 teaspoon lemon zest to balance the richness and brighten all the flavors beautifully.
When selecting boneless skinless chicken breasts, look for pieces of similar size to ensure even cooking. If your breasts are particularly thick, slicing them horizontally into chicken cutlets will help them cook more uniformly and prevent drying out. Always remember to pat your chicken breasts thoroughly dry with paper towels before seasoning; this is crucial for the mayonnaise mixture to adhere properly.
Mayonnaise forms the backbone of our coating. I have found that the quality and fat content of your mayonnaise significantly impact the final texture and stability of the topping. Full-fat mayonnaise generally provides the best results for a rich, stable crust. While light mayonnaise can be used as a lighter option, be aware it might yield a slightly different textural outcome due to its lower fat content. This difference can be subtle, but a higher-quality avocado oil mayo, for instance, can offer superior stability during baking compared to some store-bought brands.
For the grated Parmesan cheese, using freshly grated offers a superior flavor and melts more beautifully than pre-shredded varieties. The convenience of pre-shredded is there, but the taste difference is noticeable.
This recipe is naturally keto-friendly and suitable for low-carb diets. If you need a gluten-free option for the Panko-Parmesan crisp, you can easily substitute gluten-free Panko breadcrumbs. Alternatively, almond flour or finely crushed pork rind crumbs can also provide a similar textural element if you are looking for gluten-free panko alternatives.

How to Make Melt-In-Your-Mouth Chicken
This section guides you through creating my famous Melt-In-Your-Mouth Chicken. Each step is designed for maximum flavor and that perfect, tender result.
Prepare Your Oven and Baking Dish
First, preheat your oven to 375°F. While the oven warms, take a 9- x 13-inch baking dish and spray it thoroughly with cooking spray. This ensures your beautiful chicken does not stick.
Prepare the Chicken
Carefully cut each boneless, skinless chicken breast in half lengthwise. This creates thinner, more uniform chicken cutlets, which is key for even cooking. Transfer these pieces into your prepared baking dish. Next, evenly season both sides of each chicken piece with 1/2 teaspoon of salt and 1/2 teaspoon of black pepper. Remember to pat the chicken completely dry before seasoning; this allows the spices to adhere better and prepares the surface for the topping.
Create the Signature Panko-Parmesan Crisp Mixture
In a medium bowl, combine the 3/4 cup mayonnaise, 1/2 cup grated Parmesan cheese, the remaining 1/2 teaspoon salt, 1/2 teaspoon pepper, 1/2 teaspoon onion powder, 1/2 teaspoon garlic powder, and 1/2 teaspoon paprika. Now, for my unique twist that ensures a crisp, never-soggy topping, fold in 1/4 cup Panko breadcrumbs and 1 teaspoon lemon zest. Stir everything together until it forms a thick, spreadable paste. This is crucial; a thick paste will cling beautifully to the chicken and bake into a golden crust, not a runny sauce. Avoid using too much topping, as a moderate, even layer works best.
Apply Topping and Bake
Take your Parmesan mixture and spread it evenly on top of each piece of chicken. Make sure every surface is coated, but do not overload it. Place the baking dish into your preheated oven. Bake for 25-30 minutes, or until the chicken reaches an internal temperature of 165°F. I always use an instant-read thermometer to check for perfect doneness, pulling the chicken exactly at 165°F to prevent overcooking and stringiness.
Finish and Serve
Once baked to perfection, remove the Melt-In-Your-Mouth Chicken from the oven. Garnish generously with 1 tablespoon of freshly chopped parsley for a burst of fresh flavor and a beautiful presentation.
Mastering the Crisp Topping: No More Soggy Chicken!
A common complaint I hear about mayo-baked chicken is the topping turning out wet or soggy. I have dedicated much effort to troubleshooting guide for soggy toppings, and I am excited to share my secret to a consistently crispy, golden crust. It is all in the Maillard reaction and proper emulsification.
The Panko-Parmesan mixture I developed is engineered for crispness. Panko breadcrumbs are fantastic because they actively absorb excess moisture released from the mayonnaise as it heats. This prevents the moisture from steaming the topping. The mayonnaise itself acts as a stable fat base, providing a consistent medium for the Maillard reaction, which is that magical browning process responsible for all the delicious, complex flavors and the beautiful golden color we crave. The emulsification of the mayonnaise, cheese, and Panko forms a stable layer that protects the chicken while transforming into a delightful crisp.
Here are my top tips for achieving a consistently crispy topping:
Pat Dry Chicken: This cannot be stressed enough. Pat your chicken breasts completely dry with paper towels before applying any seasoning or topping. Moisture on the chicken surface will create steam, leading to a soggy crust.
Mayo Consistency: Ensure your mayonnaise mixture is thick enough to cling firmly to the chicken. If it is too runny, it will slide off or create a watery layer beneath the crust. A thick paste is your goal.
Panko & Zest Integration: This is my game-changer. Folding in Panko breadcrumbs is vital for moisture control and texture. The lemon zest adds a bright acidity that enhances the browning and prevents the dish from feeling heavy. Always fold these in when preparing the mayo mixture.
Even Application: Spread the topping evenly over each chicken piece. Avoid thick clumps in some areas and thin spots in others, as this leads to uneven browning and texture.
Oven Temperature: While the main goal is cooking the chicken through, optimal oven temperatures around 375°F (190°C) help achieve good browning without overcooking the meat.
Regarding mayonnaise quality, I have noticed a difference. A comparison of store-bought vs. high-quality avocado oil mayo for stability shows that higher-fat, more stable mayos tend to hold up better under heat, contributing to a more robust and better-formed crust.
Achieving Perfect Doneness: Internal Temperature & Carry-Over
Ensuring your Melt-In-Your-Mouth Chicken is cooked perfectly is paramount for both food safety and that coveted tender texture. This section will delve into the detailed internal temperature chart for carry-over cooking, which is crucial for juicy results.
The importance of internal temperature cannot be overstated. Reaching the precise internal temperature is not just about food safety; it is the ultimate safeguard against dry chicken, a common mistake that can ruin even the best recipes. Overcooked chicken becomes stringy and loses its delightful juiciness, which we are actively trying to avoid.
My most essential tool in the kitchen, especially for proteins, is an instant-read thermometer. This simple device takes all the guesswork out of cooking. You can find essential tools like a reliable meat thermometer at any kitchen store.
For poultry, the safe internal temperature is 165°F (74°C). This is the magic number you are aiming for.
Now, let us talk about carry-over cooking. This phenomenon occurs when food continues to cook after it has been removed from the heat source. The residual heat trapped within the chicken continues to elevate its internal temperature. For this reason, I often recommend pulling your chicken slightly before it reaches 165°F, typically between 160-163°F (71-73°C). Then, immediately cover the baking dish loosely with foil and let the chicken rest for 5-10 minutes. During this resting period, the temperature will rise to the safe 165°F, and more importantly, the juices, which have been pushed to the center by the heat, will redistribute throughout the meat. This step is critical for ensuring every bite is incredibly juicy and prevents overcooking.
Never rely solely on visual cues like “no pink” to determine doneness. While helpful, they are not as accurate as an instant-read thermometer. Trust your thermometer; it is your best friend for achieving perfect results every time.
Pro Tips & Troubleshooting
Here are my expert tips and common mistakes to avoid, ensuring your Melt-In-Your-Mouth Chicken is a resounding success.
Pro Tips
* Always pat chicken breasts completely dry with paper towels before seasoning; this is key for the topping to adhere properly and prevent sogginess.
* Make sure your mayonnaise mixture is a thick, spreadable paste, not runny, to ensure it clings well and bakes into a crust, not a sauce.
* Invest in an instant-read thermometer and pull the chicken exactly when it reaches an internal temperature of 165°F to guarantee juiciness and avoid overcooking.
* Do not skip the lemon zest in the mayo mixture; it is subtle but cuts through the richness and brightens the flavors, enhancing the overall profile.
* If your chicken breasts are particularly thick, slice them horizontally into chicken cutlets for more uniform cooking, ensuring every piece is tender.
* For an appealing oven-to-table presentation, arrange the chicken beautifully in the baking dish and garnish with fresh parsley just before serving family style.
Common Mistakes to Avoid
* Over-topping: Using too much topping can lead to a ‘wet’ or soggy texture instead of a crisp crust. Aim for an even, moderate layer.
* Overcooking: Baking chicken breasts past 165°F will make them stringy and dry, even with the protective mayo coating. Always trust your instant-read thermometer.
* Wet Chicken: Applying the mayo mixture to cold, wet chicken will cause it to slide off in the oven, preventing a proper crust from forming.
* Not Incorporating Panko/Zest: Skipping the Panko breadcrumbs and lemon zest will result in a less crispy topping and a richer, potentially heavier flavor profile.
* Skipping the Rest: Not letting the chicken rest after baking leads to dry meat as the precious juices escape immediately upon slicing instead of redistributing.
Serving & Storage
Once your Melt-In-Your-Mouth Chicken is baked to golden perfection, here is how I recommend serving it and handling any delicious leftovers.
Serving Ideas
This savory, nutty Melt-In-Your-Mouth Chicken pairs wonderfully with a variety of side dishes. I love serving it with roasted Brussels sprouts or grilled asparagus for a touch of freshness and vibrant color. Creamy mashed potatoes with cream cheese or a fluffy rice pilaf are also excellent choices, soaking up any delicious creamy bits from the baking dish. Do not forget some warm garlic bread or dinner rolls; they are perfect for enjoying every last drop of flavor. Always remember to garnish with fresh parsley right before you serve for a beautiful oven-to-table presentation.
Storage and Make-Ahead
Leftovers of this baked chicken will last beautifully in an airtight container in the refrigerator for up to 3-4 days. This makes it a fantastic option for meal prep throughout the week.
To reheat, the best way to maintain the crust and prevent it from getting greasy is to avoid the microwave. For a crisp crust, I recommend reheating your chicken in an oven or an air fryer at around 350-375°F (175-190°C) until warmed through and the crust is crisp again. This method truly revives the texture.
You can definitely prep this dish ahead of time and bake it later. My recommendation is to season the chicken, prepare the mayonnaise mixture (with Panko and lemon zest), and store them separately in airtight containers in the refrigerator for up to one day. You can also assemble the chicken in the baking dish with the topping, cover it tightly, and refrigerate for a few hours before baking. For freezing tips for mayo-coated meats, I generally recommend freezing the chicken without the mayonnaise mixture if possible, then adding fresh topping just before baking from frozen for the best texture.
Conclusion
There you have it: the secret to truly incredible Melt-In-Your-Mouth Chicken. This recipe promises not just tenderness but also a game-changing Panko-Parmesan crisp finish that elevates every bite. Say goodbye to dry, bland chicken and soggy toppings forever. With my expert tips and this straightforward recipe, you can achieve perfect, juicy results every time, even if you are new to cooking chicken. I encourage you to try this recipe, perhaps experimenting with boneless chicken thighs for an even higher fat content and juiciness if you prefer. Share your success in the comments below, or explore other delicious chicken dishes on my site, like these juicy slow cooker chicken breasts. Happy cooking!
FAQ
Q: Does the chicken taste like mayonnaise after baking?
A: No, the finished Melt-In-Your-Mouth Chicken does not taste distinctly like mayonnaise. During baking, the mayonnaise acts as a tenderizer and a rich fat vehicle. It melts into the chicken and transforms into a savory, protective crust when combined with the Parmesan cheese, spices, and Panko. It provides moisture and a delicious savory note without imparting a strong raw mayo flavor.
Q: How do I make the topping more crispy and less wet?
A: To achieve a crispy, non-soggy topping, ensure your chicken is patted completely dry before applying the mixture. Crucially, incorporate the 1/4 cup Panko breadcrumbs and 1 teaspoon lemon zest into your mayonnaise mixture; the Panko absorbs moisture, and the zest brightens the flavor. Also, apply the topping in an even, moderate layer rather than too thickly. Bake until the topping is golden brown and bubbling, indicating the Maillard reaction has occurred.
Q: Can I use chicken thighs instead of breasts for melt-in-your-mouth chicken?
A: Yes, absolutely! Boneless chicken thighs are an excellent substitute for an even juicier and richer result due to their higher fat content. The cooking time might vary slightly, so always use an instant-read thermometer to check for doneness.
Q: What is the best way to reheat leftovers to maintain the crust?
A: The best way to reheat your Melt-In-Your-Mouth Chicken and preserve its crisp crust is in the oven or an air fryer. Preheat to 350-375°F (175-190°C) and reheat until warmed through and the crust becomes crisp again. Avoid using the microwave, as it will make the crust soggy and the chicken potentially rubbery.
Q: Can I prep this dish ahead of time and bake it later?
A: Yes, you can prep this dish ahead. You can season the chicken and prepare the mayonnaise mixture (including the Panko and lemon zest) separately, storing them covered in the refrigerator for up to one day. For best results, I recommend assembling the dish with the topping just a few hours before baking. This helps maintain the topping’s texture.
Q: How do I ensure the chicken is cooked through but still tender?
A: The key to tender, cooked-through chicken is using an instant-read thermometer. Aim for an internal temperature of 165°F (74°C) at the thickest part of the chicken. Remove the chicken from the oven when it reaches 160-163°F and let it rest, covered, for 5-10 minutes. This allows for carry-over cooking to reach 165°F and redistributes the juices, ensuring maximum tenderness.
Q: Is this recipe keto-friendly or gluten-free?
A: Yes, this recipe is naturally keto-friendly and low-carb. For a gluten-free version, simply substitute the Panko breadcrumbs with a gluten-free Panko alternative, almond flour, or finely crushed pork rind crumbs to maintain the crisp texture.
Melt-In-Your-Mouth Chicken with Panko-Parmesan Crisp
Ingredients
Equipment
Method
- Preheat your oven to 375°F (190°C).
- Spray a 9- x 13-inch baking dish thoroughly with cooking spray.
- Carefully cut each boneless, skinless chicken breast in half lengthwise to create thinner cutlets.
- Transfer the chicken pieces into the prepared baking dish.
- Pat the chicken completely dry with paper towels.
- Evenly season both sides of each chicken piece with 1/2 teaspoon of salt and 1/2 teaspoon of black pepper.
- In a medium bowl, combine 3/4 cup mayonnaise, 1/2 cup grated Parmesan cheese, the remaining 1/2 teaspoon salt, 1/2 teaspoon pepper, 1/2 teaspoon onion powder, 1/2 teaspoon garlic powder, and 1/2 teaspoon paprika.
- Fold in 1/4 cup Panko breadcrumbs and 1 teaspoon lemon zest.
- Stir everything together until it forms a thick, spreadable paste.
- Spread the Parmesan mixture evenly on top of each piece of chicken, ensuring every surface is coated with a moderate, even layer.
- Place the baking dish into your preheated oven.
- Bake for 25-30 minutes, or until the chicken reaches an internal temperature of 165°F (74°C) using an instant-read thermometer.
- Once baked, remove the chicken from the oven.
- Garnish generously with 1 tablespoon of freshly chopped parsley.
- Let the chicken rest for 5-10 minutes, covered loosely with foil, to allow juices to redistribute.