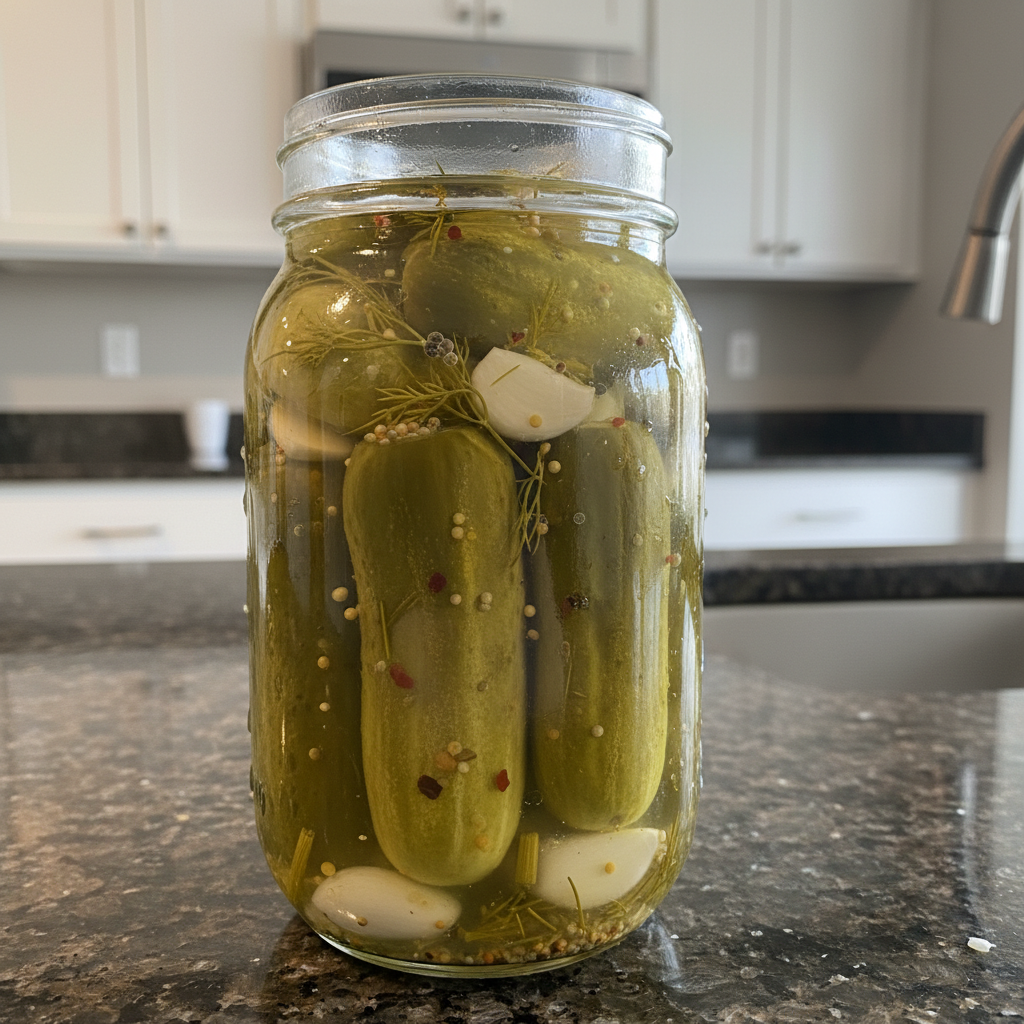
As a chef and passionate home fermenter, I live for that satisfying snap of a perfectly crunchy pickle. If you have ever been disappointed by soft, mushy pickles, then this recipe for Fermented Pickles is about to change your life. I am going to share my absolute best methods for making the crispiest, tangiest Fermented Pickles imaginable. Get ready to discover the secrets that guarantee maximum crunch and incredible flavor every single time.
Why You’ll Love This Recipe
This recipe is truly special because it guarantees crispiest pickles. My unique tannin trick and cold shocking method ensure the perfect crunch every single time you make these Fermented Pickles.
It is simple and easy. You will not need complicated equipment or techniques to achieve delicious results in your kitchen.
These Fermented Pickles offer gut-friendly goodness. They are packed with probiotics for a healthy gut, supporting your overall wellbeing.
Enjoy that classic fermented pickle taste with a satisfying crunch. These pickles deliver a deliciously tangy flavor that everyone will love.
Ingredients Needed

* 2- 2 1/2 lbs pickling cucumbers– all similar size ( 5 inches)
* 5 cups filtered water or tap water (that is not overly chlorinated)
* 2 tablespoons fine sea salt or Himalayan salt (or basically one heaping teaspoon fine sea salt (7 grams) per one cup of water, to make a 3% brine.) * see notes.
* 1/4 teaspoon turmeric (optional, adds a “fresh” flavor)
* 1 teaspoon each: fennel seeds, coriander seeds, allspice, peppercorns, dill seeds, mustard seeds, celery seeds- and feel free to add more peppercorns!
* 10-20 garlic cloves, sliced (or double for extra garlicky)
* 1/2 onion, thinly sliced (optional)
* big handful of fresh dill
* 1-3 fresh red chilies – or dried arbol chilies, or add chili flakes (all optional)
* 3-4 bay leaves (or a grape leaf or oakleaf) – these are sources of tannic acid to help them stay crisp.
Ingredient Notes & Substitutions
Pickling Cucumbers: Always look for firm, small cucumbers specifically labeled pickling cucumbers. Avoid any waxed cucumbers, as they can interfere with the fermentation process. For best results, source them fresh from your local farmer’s market.
Salt: Fine sea salt or Himalayan salt are my preferred choices for Fermented Pickles. It is crucial to avoid iodized salt, as the iodine can inhibit beneficial bacterial growth during lacto-fermentation.
Water: If your tap water is heavily chlorinated, the chlorine can hinder fermentation. To remove it, you can let the water sit out overnight, boil it and then cool it completely, or use bottled or filtered water. A good indicator of overly chlorinated water is a strong bleach-like smell.
Grape or Oak Leaves: These leaves are excellent sources of natural tannins, which are key to ensuring crunchy pickles. If fresh grape leaves or oak leaves are not available, bay leaves can be used as a substitute, though the tannin effect may be slightly less pronounced. For extra crispness, I recommend using 5-7 fresh grape or oak leaves per half-gallon jar.
Spice variations: This recipe provides a classic flavor base, but feel free to get creative. Horseradish root adds a unique, peppery kick, or you could explore different peppercorns or even a touch of star anise.
Vegan & Gluten-Free: This Fermented Pickles recipe is naturally vegan and gluten-free, making it a healthy and inclusive option for many diets.

How to Make Fermented Pickles
Making your own Fermented Pickles at home is a rewarding experience, and I am here to guide you through each step to ensure your success. Pay close attention to these details for the best, crispiest results.
Prep the Cucumbers
First, rinse your pickling cucumbers thoroughly under cool water. Next, and this is a critical step for crispness, remove about 1/16-inch from the blossom end of each cucumber. This end, opposite the stem, contains enzymes that can lead to soft pickles. Immediately after trimming, place all your cucumbers into an ice-water bath for 30 minutes. This cold shock firms them up significantly before brining, contributing to that perfect crunch. Leave them whole for optimal Fermented Pickles.
Make the Brine
In a large bowl, combine the 2 tablespoons of fine sea salt or Himalayan salt with 5 cups of cold filtered water or treated tap water. Stir the brine mixture until the salt is completely dissolved and the liquid is clear. This creates a 3% salt concentration, ideal for lacto-fermentation.
Prepare Your Jar
Wash your hands, jars, and any utensils you plan to use thoroughly with hot soap and water. While full sterilization is not required for fermentation, cleanliness is essential to prevent unwanted bacteria from taking hold. I prefer using a two-quart mason jar for this recipe.
Assemble the Pickles
Start by placing all the whole spices, such as fennel seeds, coriander seeds, allspice, peppercorns, dill seeds, mustard seeds, and celery seeds, along with the turmeric if you are using it, into the bottom of your clean mason jar. Next, add the sliced garlic and sliced onion, if using, and a big handful of fresh dill. With clean hands, begin packing the cucumbers tightly into the jar, standing them on end. Once you have a layer, distribute the bay leaves, grape leaves, or oak leaves throughout the jar. Then, add a second layer of cucumbers, also standing on end. Gently press everything down, ensuring you leave about 1 ½ inches of headspace at the top of the jar.
Add Brine and Weigh Down
Carefully pour the saltwater brine over the packed cucumbers, making sure they are completely submerged. Submergence is vital to prevent mold. Use fermentation weights, such as glass or ceramic weights, to keep the cucumbers firmly below the brine line. Any spices or dill that float to the surface should be removed to avoid potential mold growth. Cover the jar loosely with a lid or a breathable cloth. The goal is to allow air and fermentation gases to escape while keeping dust and pests out.
Ferment
Place the jar in a pan or bowl to catch any overflow that might occur as the Fermented Pickles start bubbling. Store your jar in a cool, dark place, ideally between 60-70°F. A basement or a lower kitchen cupboard often works well. The fermentation process for these Crunchy pickles will take anywhere from 2 to 21 days, depending on your desired level of sourness. Half-sour pickles, which retain a crisp, white interior, typically take 3-5 days. If your environment is cooler than 65°F, fermentation may be slower; if it is warmer, it will proceed faster. Full-sour pickles will develop a deeper tang and usually take 14-21 days.
Check and Inspect
After about 2 days, begin checking for signs of active fermentation. Look for small bubbles rising in the brine, some overflow, or a general cloudiness developing in the liquid. You can gently tap the jar to encourage tiny bubbles to rise. I personally enjoy my Fermented Pickles crunchy and prefer to ferment them for 3-4 days. You can taste test at any point after you observe bubbles and continue fermentation longer if you desire a tangier pickle. The brine will naturally become cloudy, which is a good indication that the lacto-fermentation is progressing successfully. Once you see active bubbling, you can transfer the jar to the refrigerator. This will significantly slow down the fermentation process. Always ensure the pickles remain submerged in the brine, even in the fridge.
Refrigerate
Once your Fermented Pickles have reached your desired level of tanginess and are chilled, give them a final taste test. They should be wonderfully crispy and flavorful. If you decide you prefer a tangier or slightly softer pickle after refrigeration, you can always bring them back out to ferment for a few more days at room temperature before returning them to the fridge.
Optional: Fizzy Brine
For those who enjoy a fizzy brine, you can tighten the lid on your jar. Remember to “burp” the jar by unscrewing the lid weekly (if refrigerated) or daily (if still fermenting at room temperature) to release built-up pressure. Alternatively, using an airlock on your jar is an excellent way to allow gases to escape without daily attention. If you prefer not to think about it, simply give the lid one loose twist so it is on there securely enough but still allows gases to escape naturally.
Safe Fermentation: Identifying Kahm Yeast vs. Mold
When making Fermented Pickles, it is important to distinguish between harmless kahm yeast and harmful mold. Knowing the difference ensures your fermentation is safe and successful.
Kahm Yeast: This is a common and generally harmless occurrence in lacto-fermentation. Its appearance is typically a white or off-white, thin, and often wrinkled film that forms on the surface of the brine. It usually has a mild, yeasty or slightly sour smell, which is not pungent or foul. If you see kahm yeast, you can simply scoop it off the surface of the brine. Your Fermented Pickles will still be safe to eat.
Mold: In contrast, mold is harmful and indicates a spoiled batch. It appears as fuzzy, colorful growth, often green, blue, or black, on the surface of the brine or directly on the vegetables. Mold also typically produces a foul, musty, or rotten smell. If you suspect or identify mold, it is safest to discard the entire batch of Fermented Pickles.
Prevention: To prevent both kahm yeast and mold, always ensure that your pickling cucumbers and any other vegetables are fully submerged under the brine. Remove any spices or dill that float to the surface. Using clean jars and utensils is also a critical step in maintaining a healthy fermentation environment.
Achieving the Perfect Fermentation Temperature
Temperature control is a crucial, yet often overlooked, factor in crafting the best Fermented Pickles. It impacts not only the crispness of your pickles but also their flavor development and overall safety.
The Ideal Range (60-70°F): I always aim for a temperature range of 60-70°F (15-21°C) for my lacto-fermentation projects.
Crispness: This cooler range slows down the activity of pectinase enzymes, which are naturally present in cucumbers and can cause softening. A slower fermentation helps preserve the firmness of your Fermented Pickles.
Flavor Development: Within this temperature window, the beneficial lactic acid bacteria thrive, producing a balanced and complex flavor profile. Too warm, and the fermentation can become too aggressive, leading to off-flavors.
Yeast Control: Maintaining a moderate temperature prevents excessive yeast growth, which can sometimes result in yeasty or alcoholic off-flavors in your brine.
Troubleshooting Temperature Issues:
Too Warm (Above 70°F): If your Fermented Pickles ferment in a space that is too warm, they may become soft more quickly and develop undesirable flavors. The fermentation process can be too rapid and uncontrolled.
Too Cold (Below 60°F): Conversely, if the temperature is too cold, fermentation may slow down significantly or even stall completely. This can prolong the process and potentially increase the risk of spoilage before proper lactic acid production begins.
Tips for Maintaining Optimal Temperature:
Basement Storage: Many basements naturally maintain a cooler, more consistent temperature year-round, making them an ideal spot for Fermented Pickles.
Cooler with Ice Packs: In warmer climates or during summer months, you can place your fermenting jar in a cooler with a few ice packs. Monitor the temperature and change the ice packs as needed to maintain the 60-70°F range.
Lower Kitchen Cupboard: Generally, lower kitchen cupboards or pantries tend to be cooler than higher shelves or areas exposed to direct sunlight or appliance heat.
Pro Tips & Troubleshooting
Making Fermented Pickles is a delightful culinary journey, and with these expert insights, you will achieve delicious results every time.
Pro Tips
Ferment at cooler temps (60-70F) to keep pickles crisp. If your home is hot, try placing the jar in a cooler with ice packs, changing them as needed to maintain the optimal temperature for your Fermented Pickles.
The longer you ferment them (unrefrigerated), the tangier and softer they will get. Decide your preferred level of sourness and crunch.
If you like fizzy brine, tighten the lid and burp daily (if leaving out) or weekly (if in the fridge) to release carbon dioxide buildup. Alternatively, an airlock can manage gas release for you.
Always fish out any floating spices or vegetable bits to prevent mold from developing on the surface of your Fermented Pickles.
For a stronger brine suitable for longer ferments and full sour pickles (14-21 days), use a 4.5% salt ratio, which is approximately 10.8 grams of salt per cup of water.
Use 5-7 fresh grape or oak leaves per half-gallon jar for maximum crispness. The tannins in these leaves are crucial for inhibiting enzymes that can soften your Fermented Pickles.
The ice-water bath for cucumbers is non-negotiable for optimal crunch. This step firms the cucumbers before brining.
Common Mistakes to Avoid
Not removing 1/16-inch of the flower end of each cucumber. This end contains enzymes that can make pickles soft, so trimming it is a key step for crunchy Fermented Pickles.
Too warm fermentation temperature (above 70F) leading to soft pickles. High temperatures accelerate enzyme activity and can result in undesirable textures.
Too much salt in brine (kills off all bacteria), or too little salt (allows bad bacteria to live). A 3% salt concentration is generally ideal for balancing flavor and safety in Fermented Pickles.
Not keeping cucumbers fully submerged under brine, leading to mold development. Any exposed vegetable matter is susceptible to mold growth. Use fermentation weights diligently.
Using dirty hands, utensils, or jars, causing contamination. While full sterilization is not needed, thorough cleaning is essential to encourage beneficial bacteria.
Serving & Storage
Once your Fermented Pickles are ready, you will find countless ways to enjoy their tangy crunch. Proper storage will ensure they stay delicious for months.
Serving Ideas
Serve as a low-calorie snack straight from the jar. These Fermented Pickles are wonderfully satisfying.
Slice and add them to your favorite sandwiches or wraps for an extra layer of flavor and crunch.
Serve as a tasty side dish with burgers, hot dogs, or grilled meats. They cut through richness beautifully.
Drink a shot of the fizzy brine as an immunity-boosting tonic. It is packed with beneficial probiotics for gut health.
For a unique twist, use the brine in a Gin and Brine martini for a savory cocktail experience.
Storage
Store your Fermented Pickles in the refrigerator for up to several months. While they will remain safe to eat for a long time, their flavor and texture may slowly change over time, typically becoming softer and more sour.
Always ensure the Fermented Pickles remain submerged in the brine for optimal preservation and to prevent spoilage. If needed, you can add a little extra cooled, non-chlorinated, salted water (using the 3% brine ratio) to keep them covered.
For long-term quality, store them in the coolest part of your refrigerator, usually the back, where temperatures are most consistent. Avoid placing them near the door where temperature fluctuations are common.
Conclusion
With this recipe, you are just days away from enjoying the crispiest, tangiest, and most satisfying Fermented Pickles you have ever tasted. The secret? My unique combination of enhanced tannin inclusion and cold brine shocking guarantees a crunch that rivals any store-bought pickle. Do not be intimidated by fermentation – this recipe is simple, straightforward, and perfect for beginners. So gather your ingredients, follow our easy steps, and get ready to enjoy a delicious and gut-friendly treat! For best results, source your pickling cucumbers locally from a farmer’s market, ensuring peak freshness. Now go ahead and give this recipe a try, and do not forget to share it with your friends and family!
FAQ
How long does it take to ferment pickles?
Fermentation time varies depending on temperature and desired sourness. Half-sour pickles typically take 3-5 days, while full-sour pickles, with a deeper tang, usually take 14-21 days.
What is the best salt-to-water ratio for crunchy fermented pickles?
I recommend a 3% brine solution for optimal flavor and crunch. This is approximately 2 tablespoons of fine sea salt per 5 cups of water, or essentially one heaping teaspoon of fine sea salt (7 grams) per one cup of water.
How can I ensure my fermented pickles stay crisp?
My recipe includes two key steps for maximum crispness: using 5-7 fresh grape or oak leaves per half-gallon jar (which provide beneficial tannins) and soaking the pickling cucumbers in an ice-water bath for 30 minutes before brining. Removing the blossom end of each cucumber also helps.
What are the signs of successful fermentation versus spoilage?
Successful fermentation is indicated by consistent bubbling, cloudiness in the brine, and a pleasant tangy smell. Spoilage is indicated by fuzzy mold (green, blue, or black) and a foul, musty, or rotten odor. Harmless kahm yeast may appear as a thin, white film.
Can I ferment pickles if my tap water is chlorinated?
Chlorine can inhibit the beneficial bacteria crucial for lacto-fermentation. To remove chlorine, you can let your tap water sit out overnight, boil it and then cool it completely, or simply use bottled or filtered water.
What happens if my fermented pickles turn out soft?
Soft Fermented Pickles can be caused by several factors: too warm of a fermentation temperature (above 70F), not removing the blossom end of the cucumber, or not using enough tannins from grape or oak leaves. Follow my recipe carefully for the best, crispiest results.
Are there any tell tale signs that fermented pickles are bad?
Yes, look for fuzzy mold which is usually green, blue, or black in color. A foul or rotten smell, distinct from a pleasant sour or yeasty aroma, is another strong indicator. Additionally, an unusually slimy texture beyond a slight slickness can suggest spoilage. If any of these signs are present, it is best to discard the pickles.
Crispiest Fermented Pickles
Ingredients
Equipment
Method
- Rinse your pickling cucumbers thoroughly under cool water.
- Remove about 1/16-inch from the blossom end of each cucumber (the end opposite the stem) as it contains enzymes that can lead to soft pickles.
- Immediately place all trimmed cucumbers into an ice-water bath for 30 minutes to firm them up. Leave them whole for optimal results.
- In a large bowl, combine 2 tablespoons of fine sea salt or Himalayan salt with 5 cups of cold filtered water or treated tap water.
- Stir the brine mixture until the salt is completely dissolved and the liquid is clear, creating a 3% salt concentration.
- Wash your hands, jars, and any utensils thoroughly with hot soap and water. Cleanliness is essential to prevent unwanted bacteria.
- Use a two-quart mason jar for this recipe.
- Place all whole spices (fennel seeds, coriander seeds, allspice, peppercorns, dill seeds, mustard seeds, celery seeds) and turmeric (if using) into the bottom of the clean mason jar.
- Next, add the sliced garlic and sliced onion (if using), and a big handful of fresh dill.
- With clean hands, begin packing the cucumbers tightly into the jar, standing them on end.
- Once you have a layer, distribute the bay leaves, grape leaves, or oak leaves throughout the jar.
- Add a second layer of cucumbers, also standing on end.
- Gently press everything down, ensuring you leave about 1 ½ inches of headspace at the top of the jar.
- Carefully pour the saltwater brine over the packed cucumbers, ensuring they are completely submerged to prevent mold.
- Use fermentation weights (glass or ceramic) to keep the cucumbers firmly below the brine line.
- Remove any spices or dill that float to the surface to avoid potential mold growth.
- Cover the jar loosely with a lid or a breathable cloth to allow air and fermentation gases to escape while keeping dust and pests out.
- Place the jar in a pan or bowl to catch any overflow.
- Store your jar in a cool, dark place, ideally between 60-70°F (15-21°C).
- The fermentation process will take 2 to 21 days, depending on desired sourness: 3-5 days for half-sour, 14-21 days for full-sour. Cooler temperatures slow fermentation, warmer temperatures speed it up.
- After about 2 days, check for signs of active fermentation: small bubbles rising, some overflow, or cloudiness in the liquid. Gently tap the jar to encourage bubbles.
- Taste test at any point after bubbles appear; continue fermentation longer for a tangier pickle.
- Once active bubbling is observed, transfer the jar to the refrigerator to significantly slow down fermentation. Ensure pickles remain submerged.
- Once your pickles have reached your desired tanginess and are chilled, give them a final taste test. They should be wonderfully crispy and flavorful.
- If you prefer a tangier or softer pickle after refrigeration, you can ferment them for a few more days at room temperature before returning them to the fridge.
- To achieve a fizzy brine, tighten the lid on your jar and "burp" it by unscrewing the lid weekly (if refrigerated) or daily (if still fermenting at room temperature) to release built-up pressure.
- Alternatively, use an airlock on your jar or simply give the lid one loose twist to allow gases to escape naturally without daily attention.