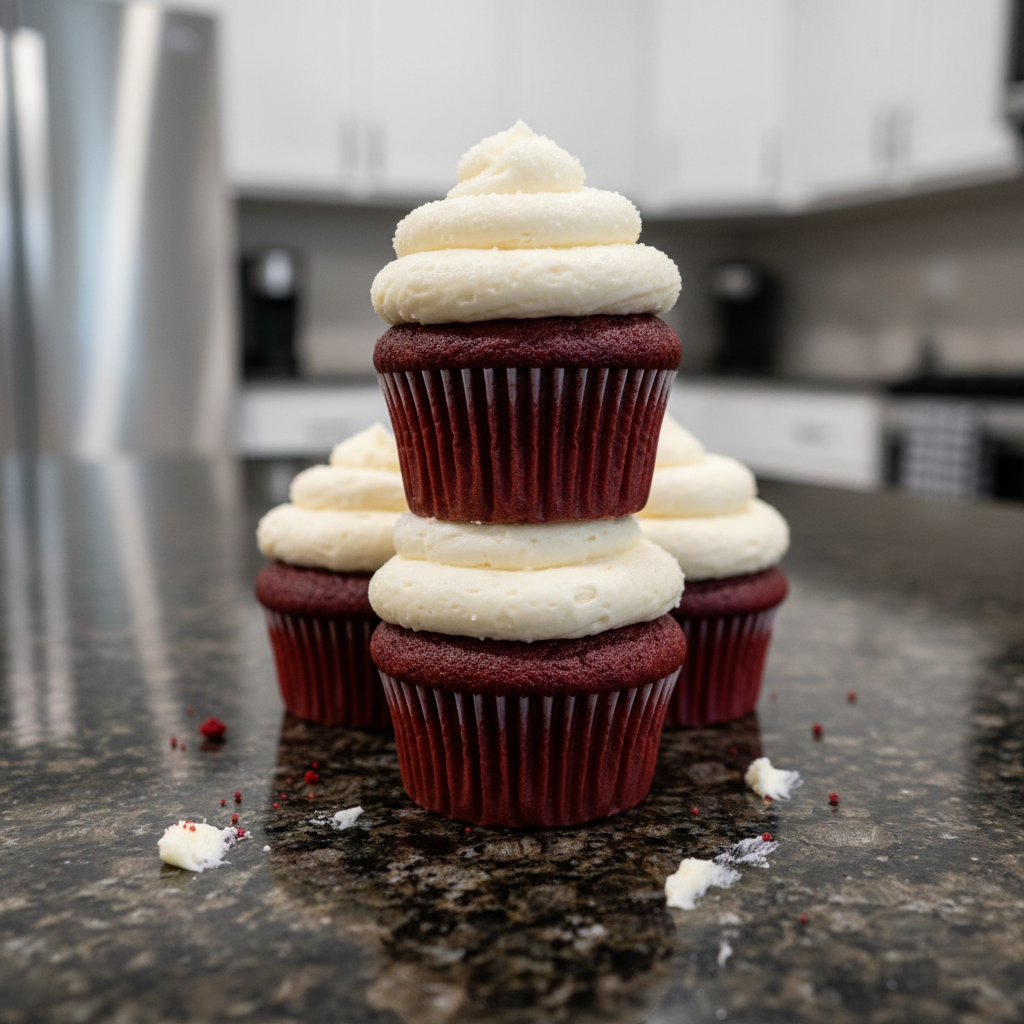
Welcome to my kitchen! Today, we are diving into the delightful world of Red Velvet Cupcakes. These iconic treats, with their stunning vibrant red color and delicate crumb, are a feast for both the eyes and the palate. For an interesting read on the origins of this classic dessert, check out the history behind traditional Red Velvet Cake and Cupcakes. Many bakers struggle with runny frosting, but I am excited to share my perfected recipe for Red Velvet Cupcakes, complete with a foolproof, perfectly stable cream cheese frosting that pipes like a dream and delivers an irresistible tangy flavor. Get ready to bake the best red velvet cupcakes you have ever tasted.
Why You’ll Love This Recipe
This recipe features a stabilized cream cheese frosting that holds its shape beautifully. No more runny frosting. This frosting is tangy, firm, and perfect for piping.
This recipe provides a perfect balance of flavors. The subtle chocolate notes of the cupcake pair perfectly with the tangy cream cheese frosting.
This recipe is easy to follow. It is designed for home bakers of all skill levels.
These cupcakes are guaranteed to be a crowd-pleaser. Impress your friends and family with these gorgeous Red Velvet Cupcakes.
Ingredients Needed

2 large eggs, room temperature and separated
1 and 1/3 cups (166g) all-purpose flour* (spooned & leveled)
1/4 cup (32g) cornstarch*
1/2 teaspoon baking soda
4 teaspoons (7g) natural unsweetened cocoa powder
1/4 teaspoon salt
1/4 cup (4 Tbsp; 56g) unsalted butter, softened to room temperature
1 cup (200g) granulated sugar
1/2 cup (120ml) canola or vegetable oil
2 teaspoons pure vanilla extract
1/2 teaspoon distilled white vinegar
liquid or gel red food coloring*
1/2 cup (120ml) buttermilk, room temperature*
cream cheese frosting for topping
Ingredient Notes & Substitutions
Flour: Accurate measurement is key when baking. Always spoon and level your all-purpose flour to avoid a dense cupcake. For an even lighter crumb, the addition of cornstarch effectively creates a homemade cake flour substitute.
Cocoa Powder: This recipe calls for natural unsweetened cocoa powder. This type of cocoa reacts with the baking soda and buttermilk to help the Red Velvet Cupcakes rise. Avoid Dutch-processed cocoa powder, which has been alkalized and will not react properly with the leavening agents in this recipe.
Fat: The combination of unsalted butter and canola oil is crucial for a moist crumb and rich, buttery flavor. Unsalted butter allows for precise control over the salt content in the Red Velvet Cupcakes. Canola oil or vegetable oil are interchangeable here. These fats contribute to a velvety texture that is simply irresistible.
Buttermilk: Buttermilk is vital for both flavor and leavening. It reacts with the baking soda to create a light and airy texture. For more on how this works, read about the science of baking with carbon dioxide. Ensure your buttermilk is at room temperature for proper emulsification with other ingredients. If you do not have buttermilk, you can make a quick substitute by adding 1/2 tablespoon of distilled white vinegar or lemon juice to a measuring cup, then filling the rest with milk to make 1/2 cup, letting it sit for 5 minutes.
Red Food Coloring: For that vibrant red color synonymous with Red Velvet Cupcakes, I highly recommend using gel red food coloring. Brands like Americolor or Wilton offer concentrated gels that provide a much richer hue than liquid food coloring without adding excess moisture to the batter. Start with 1.5 to 2 tablespoons for a deep red, and adjust to your desired shade.
Eggs: Using large eggs that are at room temperature is essential for proper emulsification and a consistent batter. Separating the eggs and whipping the whites to soft peaks before folding them in helps create a lighter, fluffier texture in the final cupcake.

How to Make Red Velvet Cupcakes
Preparing the Oven and Pans
1. Preheat oven to 350°F (177°C). Line a 12-count muffin pan with cupcake liners. This Red Velvet Cupcakes recipe makes 14 cupcakes, so you will have 2 cupcakes to bake in a second batch.
Whipping Egg Whites for Airiness
2. In a medium bowl, using a handheld or stand mixer with a whisk attachment, beat the 2 egg whites on high speed until soft peaks form, about 2-3 minutes. The peaks should be soft and drooping, indicating they are perfectly aerated without being over-whipped. Set them aside.
Sifting Dry Ingredients for Evenness
3. In a separate medium bowl, sift the all-purpose flour and cornstarch together to ensure they are evenly combined and lump-free. Then, whisk in the baking soda, natural unsweetened cocoa powder, and salt. Sifting helps achieve a uniform distribution of leavening agents and flavor. Set this mixture aside.
Creaming Butter and Sugar
4. In a large bowl, using a handheld or stand mixer with a paddle attachment, beat the softened unsalted butter on high speed until it is smooth and creamy, about 1 minute. Add the granulated sugar and beat on high speed for 2 minutes until the mixture is well creamed and fluffy. Scrape down the sides and up the bottom of the bowl with a silicone spatula as needed to ensure even mixing.
Incorporating Oil for Moisture
5. Add the canola or vegetable oil and beat on high speed for another 2 minutes. Do not worry if the mixture appears slightly separated or “piece-y” at this stage. This is normal and will not negatively affect the final Red Velvet Cupcakes.
Adding Yolks and Flavor
6. Add the 2 egg yolks and pure vanilla extract. Beat on medium-high speed until they are fully combined, scraping the bowl as needed. Next, beat in the distilled white vinegar and the liquid or gel red food coloring until you achieve your desired vibrant red color. I typically use about 2 tablespoons of gel food coloring for a deep hue.
Alternating Wet and Dry
7. With the mixer on low speed, gradually add the sifted dry ingredients in three additions, alternating with the room temperature buttermilk. Begin and end with the dry ingredients. Mix each addition just until it is incorporated into the batter. It is crucial not to overmix, as this can lead to tough cupcakes.
Folding in Egg Whites
8. Gently fold the whipped egg whites into the cupcake batter using a rubber spatula or wooden spoon. Use a light hand to preserve the airiness. The batter will become silky and slightly thick. If you notice small pieces of butter still visible, do not worry; they will melt during baking and contribute to a buttery flavor.
Filling and Baking
9. Spoon the batter evenly into the prepared cupcake liners, filling each liner about 1/2 to 2/3 full.
10. Bake for 20-21 minutes, or until the tops of the Red Velvet Cupcakes spring back when gently touched, and a toothpick inserted into the center comes out clean. Be very careful not to overbake, as this is the primary cause of dry cupcakes.
11. Allow the Red Velvet Cupcakes to cool in the pan for 5 minutes before transferring them to a wire rack to cool completely. Cooling thoroughly is important before frosting.
Frosting the Cooled Cupcakes
12. Prepare the stabilized cream cheese frosting (see recipe below). Once the Red Velvet Cupcakes are completely cooled, frost them immediately before serving for the best presentation and taste.
Stabilized Cream Cheese Frosting Recipe
This Cream Cheese Frosting recipe ensures a pipeable, stable, and wonderfully tangy topping for your Red Velvet Cupcakes. The addition of cornstarch helps absorb excess moisture from the cream cheese, preventing a runny frosting and making it perfect for intricate piping with a piping bag and piping tip.
Ingredients
8 ounces (226g) full-fat cream cheese, softened to room temperature
1/2 cup (113g) unsalted butter, softened to room temperature
3-4 cups (360-480g) powdered sugar, sifted
1 teaspoon pure vanilla extract
1 tablespoon cornstarch or meringue powder
Instructions
1. In a large bowl, using an electric mixer with a paddle attachment, beat the softened unsalted butter on medium-high speed until smooth and creamy, about 1-2 minutes.
2. Add the softened full-fat cream cheese to the bowl. Beat on medium speed until both the butter and cream cheese are fully combined and smooth. Be careful not to overbeat the cream cheese at this stage, as it can thin out.
3. Gradually add the sifted powdered sugar, one cup at a time, beating on low speed until just combined before increasing to medium speed. Scrape down the sides of the bowl as needed to ensure all the sugar is incorporated.
4. Add the pure vanilla extract and the cornstarch (or meringue powder). Beat on medium-high speed for another 2-3 minutes, until the frosting is light, fluffy, and noticeably thickened.
5. If the frosting seems too thick, you can add a tiny splash of milk (1/2 teaspoon at a time) to reach your desired consistency. If it is too thin, add another tablespoon or two of sifted powdered sugar.
6. For optimal piping stability, I highly recommend chilling the Cream Cheese Frosting in the refrigerator for at least 30 minutes before transferring it to a piping bag.
Tips for Perfect Frosting
* Ensure both your cream cheese and butter are at proper room temperature. This is crucial for a smooth, lump-free frosting.
* Sift your powdered sugar to prevent any lumps in your Cream Cheese Frosting.
* Do not overbeat the cream cheese. Beat it just until combined with the butter, then beat more vigorously once the powdered sugar and stabilizer are added.
* If the frosting becomes too soft while piping, place it back in the refrigerator for 10-15 minutes to firm up.
Troubleshooting Common Red Velvet Cupcake Problems
Why did my cupcakes sink in the middle?
Cupcakes often sink in the middle due to several reasons related to baking science. Common culprits include opening the oven door too early, which causes a sudden temperature drop, overmixing the batter leading to excessive gluten development, or insufficient leavening from old baking soda or buttermilk not being at room temperature. An inaccurate oven temperature can also play a role, so ensuring your oven is properly calibrated is important.
Why were my cupcake tops hard?
Hard cupcake tops can be caused by over-whipping egg whites, which dries them out, or more commonly, overbaking the Red Velvet Cupcakes. Baking at too high an oven temperature can also contribute to this issue. Make sure you are checking for doneness precisely at the recommended baking time to avoid a dry or hard crumb.
Why is my frosting too thin?
A thin Cream Cheese Frosting is often the result of using cream cheese that is too soft or warm, overbeating the frosting, or not using enough powdered sugar. My stabilized cream cheese frosting recipe specifically addresses this by incorporating cornstarch (or meringue powder) and a slightly higher cream cheese to butter ratio, which helps the frosting hold its shape beautifully even at room temperature. Chilling the frosting before piping can also significantly help.
Why are my cupcakes dry?
Dry Red Velvet Cupcakes are most commonly a result of overbaking. Every oven is different, so start checking for doneness at the lower end of the baking time range. Incorrect flour measurement, especially if you scoop it directly from the bag without spooning and leveling, can also lead to too much flour and a dry crumb.
Pro Tips & Troubleshooting
Pro Tips
Use both canola oil and creamed unsalted butter for the perfect texture, combining moisture and rich flavor.
Do not overmix the batter. Overmixing activates gluten development, which leads to tough Red Velvet Cupcakes with a less velvety texture. Mix until just combined.
Use gel food coloring for a vibrant red hue. Liquid food coloring can thin the batter and often yields a duller shade.
Ensure all ingredients, especially buttermilk, unsalted butter, and large eggs, are at room temperature for proper emulsification and a smooth, consistent batter.
Spoon and level all-purpose flour for accurate measurements, preventing a dense or dry crumb.
Whip egg whites to soft peaks for a light and airy texture in your Red Velvet Cupcakes, contributing to a wonderfully fluffy texture.
Chill the Cream Cheese Frosting before piping for even more stability and cleaner swirls.
Common Mistakes to Avoid
Overbaking the Red Velvet Cupcakes. Check frequently with a toothpick inserted into the center; it should come out clean or with a few moist crumbs, but no wet batter.
Overmixing the batter. Always mix until just combined, especially after adding the dry ingredients.
Using cold ingredients. Bring all your ingredients to room temperature before starting to ensure proper emulsification.
Using liquid food coloring. Gel food coloring provides a more vibrant red color without altering the batter consistency.
Not measuring ingredients accurately. Precision is key in baking, especially for leavening agents and flour.
Forgetting the distilled white vinegar. It plays a crucial role in activating the baking soda and enhancing the vibrant red color of Red Velvet Cupcakes.
Serving & Storage
Serving Ideas
Serve these Red Velvet Cupcakes chilled or at room temperature, depending on your preference. The Cream Cheese Frosting holds up well either way.
Pair these delightful treats with a warm cup of coffee, a soothing tea, or a cold glass of milk for the ultimate dessert experience.
Garnish your Red Velvet Cupcakes with festive sprinkles, delicate chocolate shavings, or fresh berries like raspberries or strawberries for an elegant touch.
For special occasions, arrange the cupcakes on a multi-tiered stand to create a beautiful cupcake tower that serves as a stunning centerpiece.
Use a piping bag and a decorative piping tip to create beautiful swirls or rosettes with the Cream Cheese Frosting, making your presentation extra special.
Storage and Make-Ahead
Store frosted Red Velvet Cupcakes in an airtight container in the refrigerator for up to 3 days to maintain their freshness and the integrity of the Cream Cheese Frosting.
Unfrosted Red Velvet Cupcakes can be stored in an airtight container at room temperature for up to 2 days, making them a great make-ahead option.
For longer storage, freeze unfrosted cupcakes for up to 2 months. Wrap them individually in plastic wrap, then place them in a freezer-safe bag or container. Thaw completely at room temperature before frosting.
You can make the cupcake batter ahead of time and store it in the refrigerator for up to 24 hours. Ensure it is covered tightly. Give it a gentle stir before portioning into liners.
Conclusion
These Red Velvet Cupcakes are the perfect treat for any occasion! With their fluffy texture, subtle chocolate flavor, and tangy cream cheese frosting, they are sure to be a hit. And with our stabilized frosting recipe, you can be confident that your cupcakes will look as good as they taste, holding their beautiful shape. Whether you are a beginner baker or an experienced one, this recipe ensures success. So go ahead and give them a try in your kitchen. You will not be disappointed! Print the recipe and share with friends!
FAQ
Why did my red velvet cupcakes sink in the middle or have hard tops?
Cupcakes sink in the middle due to overmixing, opening the oven door too soon, or an inaccurate oven temperature. Hard tops are usually caused by overbaking or over-whipping the egg whites. Ensure accurate measurements and follow baking times closely to prevent these issues.
Can I convert this red velvet cupcake recipe into a cake or mini cupcakes?
Yes, you can adapt this recipe. For a single 8 or 9-inch round cake, bake at 350°F (177°C) for 28-32 minutes, checking for doneness. For mini cupcakes, reduce the baking time to approximately 10-14 minutes, again checking with a toothpick.
How can I make the cream cheese frosting more stable for piping?
To achieve a more stable cream cheese frosting, refer to my specific stabilized cream cheese frosting recipe above. It incorporates cornstarch (or meringue powder) and an optimal ratio of cream cheese to butter to prevent it from becoming too thin, ensuring it holds its shape beautifully for piping. Chilling the frosting for 30 minutes before use also helps significantly.
Why are buttermilk and vinegar so important in red velvet cupcakes?
Buttermilk and distilled white vinegar are crucial for Red Velvet Cupcakes. They react with the baking soda to create carbon dioxide, which acts as a leavening agent, contributing to the fluffy texture. Additionally, their acidity helps activate and enhance the red color, while also imparting a distinct tanginess that is characteristic of traditional Red Velvet Cupcakes.
What’s the best way to ensure a vibrant red color in my cupcakes?
For a truly vibrant red color, I highly recommend using gel food coloring over liquid versions. Brands like Americolor or Wilton offer concentrated colors that provide a rich hue without adding too much moisture to your batter. Add it gradually until your desired shade of red is achieved, typically around 1.5 to 2 tablespoons for a deep color.
How long can red velvet cupcakes be stored, and can they be frozen?
Frosted Red Velvet Cupcakes should be stored in an airtight container in the refrigerator for up to 3 days because of the cream cheese frosting. Unfrosted cupcakes can be kept at room temperature for up to 2 days. You can also freeze unfrosted cupcakes for up to 2 months; wrap them individually in plastic wrap before freezing and thaw them completely before frosting.
What is the difference between natural unsweetened cocoa powder and Dutch-processed cocoa?
Natural unsweetened cocoa powder is acidic and reacts with baking soda to aid in leavening, which is essential for this Red Velvet Cupcakes recipe. Dutch-processed cocoa powder, on the other hand, has been treated with an alkali to neutralize its acidity. While it has a darker color and milder flavor, it does not react with baking soda in the same way, making natural unsweetened cocoa powder the preferred choice for Red Velvet Cupcakes to ensure proper rise and flavor balance.
Best Red Velvet Cupcakes: Tangy & Stable Frosting!
Ingredients
Equipment
Method
- Preheat oven to 350°F (177°C). Line a 12-count muffin pan with cupcake liners. This recipe makes 14 cupcakes, so you will have 2 cupcakes to bake in a second batch.
- In a medium bowl, using a handheld or stand mixer with a whisk attachment, beat the 2 egg whites on high speed until soft peaks form, about 2-3 minutes. The peaks should be soft and drooping, indicating they are perfectly aerated without being over-whipped. Set them aside.
- In a separate medium bowl, sift the all-purpose flour and cornstarch together to ensure they are evenly combined and lump-free. Then, whisk in the baking soda, natural unsweetened cocoa powder, and salt. Sifting helps achieve a uniform distribution of leavening agents and flavor. Set this mixture aside.
- In a large bowl, using a handheld or stand mixer with a paddle attachment, beat the softened unsalted butter on high speed until it is smooth and creamy, about 1 minute. Add the granulated sugar and beat on high speed for 2 minutes until the mixture is well creamed and fluffy. Scrape down the sides and up the bottom of the bowl with a silicone spatula as needed to ensure even mixing.
- Add the canola or vegetable oil and beat on high speed for another 2 minutes. Do not worry if the mixture appears slightly separated or "piece-y" at this stage. This is normal and will not negatively affect the final Red Velvet Cupcakes.
- Add the 2 egg yolks and pure vanilla extract. Beat on medium-high speed until they are fully combined, scraping the bowl as needed. Next, beat in the distilled white vinegar and the liquid or gel red food coloring until you achieve your desired vibrant red color. I typically use about 2 tablespoons of gel food coloring for a deep hue.
- With the mixer on low speed, gradually add the sifted dry ingredients in three additions, alternating with the room temperature buttermilk. Begin and end with the dry ingredients. Mix each addition just until it is incorporated into the batter. It is crucial not to overmix, as this can lead to tough cupcakes.
- Gently fold the whipped egg whites into the cupcake batter using a rubber spatula or wooden spoon. Use a light hand to preserve the airiness. The batter will become silky and slightly thick. If you notice small pieces of butter still visible, do not worry; they will melt during baking and contribute to a buttery flavor.
- Spoon the batter evenly into the prepared cupcake liners, filling each liner about 1/2 to 2/3 full.
- Bake for 20-21 minutes, or until the tops of the Red Velvet Cupcakes spring back when gently touched, and a toothpick inserted into the center comes out clean. Be very careful not to overbake, as this is the primary cause of dry cupcakes.
- Allow the Red Velvet Cupcakes to cool in the pan for 5 minutes before transferring them to a wire rack to cool completely. Cooling thoroughly is important before frosting.
- Prepare the stabilized cream cheese frosting (see recipe below). Once the Red Velvet Cupcakes are completely cooled, frost them immediately before serving for the best presentation and taste.
- In a large bowl, using an electric mixer with a paddle attachment, beat the softened unsalted butter on medium-high speed until smooth and creamy, about 1-2 minutes.
- Add the softened full-fat cream cheese to the bowl. Beat on medium speed until both the butter and cream cheese are fully combined and smooth. Be careful not to overbeat the cream cheese at this stage, as it can thin out.
- Gradually add the sifted powdered sugar, one cup at a time, beating on low speed until just combined before increasing to medium speed. Scrape down the sides of the bowl as needed to ensure all the sugar is incorporated.
- Add the pure vanilla extract and the cornstarch (or meringue powder). Beat on medium-high speed for another 2-3 minutes, until the frosting is light, fluffy, and noticeably thickened.
- If the frosting seems too thick, you can add a tiny splash of milk (1/2 teaspoon at a time) to reach your desired consistency. If it is too thin, add another tablespoon or two of sifted powdered sugar.
- For optimal piping stability, I highly recommend chilling the Cream Cheese Frosting in the refrigerator for at least 30 minutes before transferring it to a piping bag.