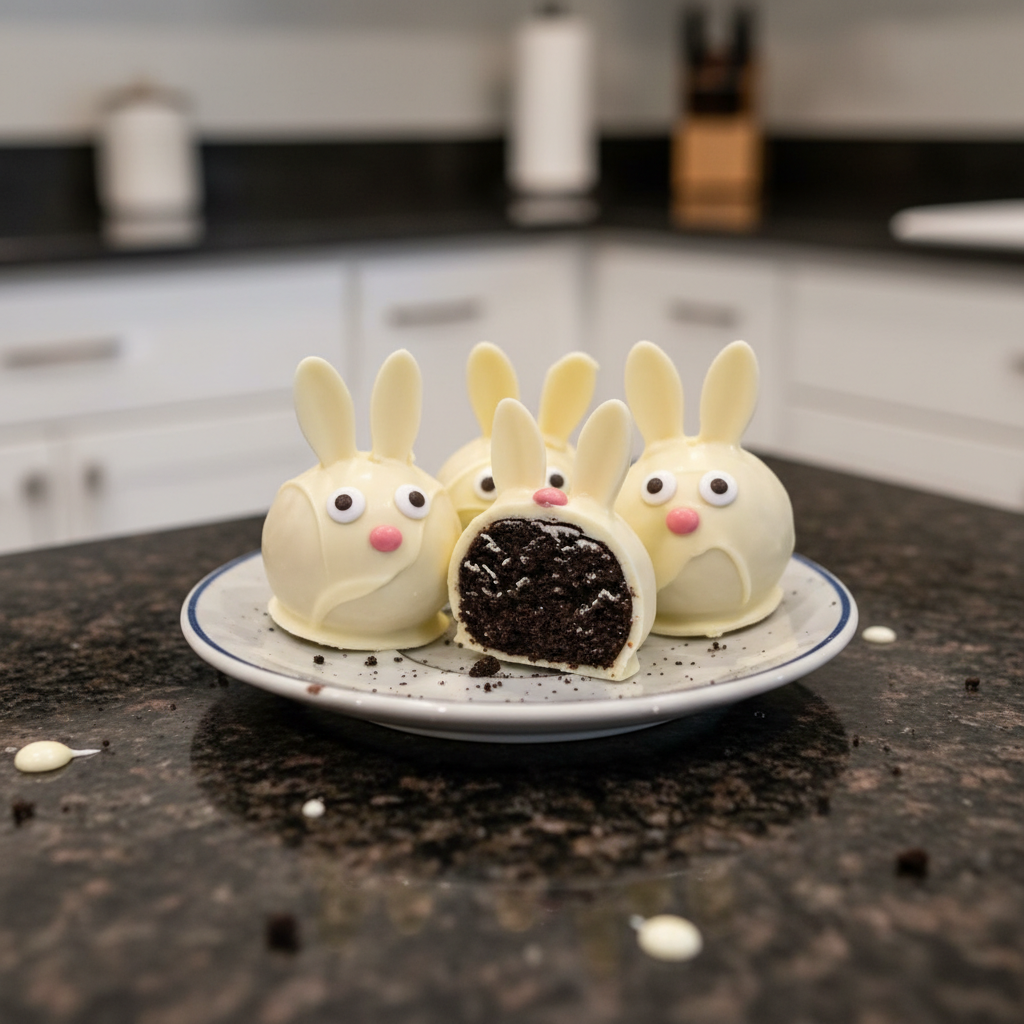
Easter is just around the corner, and if you are anything like me, you are looking for those special holiday treats that bring smiles without the stress. In my kitchen, nothing says festive, fun, and easy quite like adorable bunny oreo balls no bake. These delightful treats are a staple for spring gatherings and make the perfect addition to any Easter basket. Today, I am thrilled to share my foolproof recipe for these charming treats, and we will reveal a game-changing 15-minute flash-freeze trick for perfect results every time. Get ready to create impressive, delicious Easter treats with minimal fuss and maximum cuteness.
Why You’ll Love This Recipe
I am so excited for you to discover the secret behind truly flawless Oreo truffles. The 15-Minute Flash-Freeze Technique is my ultimate game-changer for these no-bake dessert wonders. Here is why it works so beautifully.
The science is simple yet brilliant. When you flash-freeze your rolled Oreo truffles for exactly 15 minutes, their core becomes extremely firm and intensely cold. This creates a significant temperature differential against your warm, melted white chocolate coating. The moment the cold truffle hits the warm chocolate, the coating snap-sets almost instantly.
What does this mean for you? It means no more chocolate pooling at the base of your truffles. It means a perfectly smooth, crack-free white chocolate coating every single time. And perhaps best of all, it ensures that your delicate Candy Bunny Decorations stay precisely where you place them, setting firmly without sliding. This technique offers significantly faster prep time, transforming what can sometimes be a messy dipping process into a clean and efficient one. It is a quick, fun, and family-friendly Easter treats activity that looks professionally made, making you a holiday entertaining hero with minimal effort.
Ingredients Needed

- 36 Oreo Cookies
- 8 oz cream cheese (softened)
- 16 oz white chocolate melting wafers
- Candy Bunny Decorations
Ingredient Notes & Substitutions
Oreo Cookies: For that signature smooth, truffle-like texture, it is absolutely essential to pulse your Oreo cookies into very fine crumbs. Think of a sandy consistency. This fine texture ensures proper binding with the cream cheese and a delightful mouthfeel. For fun variations, you can try Golden Oreos for a vanilla flavor profile or gluten-free chocolate sandwich cookies if you are catering to dietary needs.
Cream Cheese: Always use full-fat, block-style cream cheese for this recipe. It provides the best binding and richest flavor. Make sure it is fully softened to room temperature; this prevents any lumps in your truffle mixture and ensures everything combines smoothly. Please avoid reduced-fat or whipped varieties as they contain too much water and can make your Oreo truffles greasy or difficult to shape.
White Chocolate Melting Wafers: I cannot stress enough the importance of using high-quality confectionery coating or specialized white chocolate melting wafers. Brands like Ghirardelli or Wilton are fantastic choices. These are formulated to melt smoothly, dip beautifully, and snap-set cleanly. Regular chocolate chips often contain stabilizers that can cause them to seize or become too thick and clumpy when melted, making for a frustrating dipping experience.
Candy Bunny Decorations: These add the perfect festive touch. If you are feeling creative, consider making your own adorable details. You can slice miniature marshmallows diagonally to create bunny ears and then dip them lightly in pink sanding sugar. Alternatively, pipe custom royal icing feet onto parchment paper ahead of time and let them dry before attaching.
Essential Prep Tools: A food processor is a huge help for achieving fine cookie crumbs quickly. Parchment paper is indispensable for a non-stick surface when rolling and setting your truffles. A dipping fork or specialized candy tool will make the coating process much easier and cleaner.

How to Make Bunny Oreo Balls (Step-by-Step)
Prepare Cookie Crumbs
First, place all 36 Oreo cookies, cream filling included, into your food processor. Pulse them until they are transformed into very fine crumbs, almost resembling sand. Achieving fine crumbs is a key expert tip for a truly smooth, truffle-like texture and ensures the mixture binds properly. If you do not have a food processor, you can place the cookies in a sturdy zip-top bag and crush them thoroughly with a rolling pin until uniformly fine.
Mix Truffle Base
In a large mixing bowl, combine the fine cookie crumbs with your softened cream cheese. Mix thoroughly until everything is fully incorporated and there are no visible streaks of cream cheese. I often use a sturdy spoon, but a stand mixer with a paddle attachment or a hand mixer can also make this step effortless, ensuring a perfectly smooth truffle base.
Initial Chill
Cover the bowl and refrigerate the mixture for 10 minutes. This brief chill makes the mixture firmer and much easier to handle and roll into uniform balls.
Roll Balls
Once chilled, scoop the mixture into uniform 1-inch balls. I find a small cookie scoop works perfectly for consistent sizing. Place each ball onto a parchment paper-covered baking sheet. Consistency in size is important for even coating and a professional appearance.
Crucial Chill (The Twist Applied!)
Now, for the magic step. Refrigerate your rolled Oreo truffles for 20-30 minutes, or for the ultimate snap-set and perfect white chocolate coating, embrace The 15-Minute Flash-Freeze Technique. Place the balls in the freezer for exactly 15 minutes. They will become extremely firm, and this is critical for preventing any crumbling when dipped and ensuring that beautiful, non-pooling white chocolate coating.
Melt Chocolate
Gently melt your white chocolate melting wafers according to the package directions. It is crucial not to overheat the chocolate, as this is a common mistake that can cause it to seize or thicken, making it unusable. I recommend using a double boiler or short, controlled 15-30 second intervals in the microwave, stirring well after each burst.
Dip & Decorate
Using a dipping fork or a specialized candy tool, dip one Oreo truffle at a time into the melted white chocolate coating. Gently tap off any excess chocolate. Immediately place the coated truffle onto a fresh parchment-covered baking sheet and apply your Candy Bunny Decorations. Because your truffle is so cold, the white chocolate coating will set very quickly, so work efficiently on each individual truffle.
Final Set
Refrigerate your decorated bunny oreo balls no bake until the white chocolate coating is fully set and firm. Then they are ready to serve and enjoy!
Essential Kitchen Tools & Troubleshooting
Kitchen Tool Alternatives: No Food Processor?
A food processor is fantastic for quickly creating very fine Oreo cookie crumbs, which are essential for a smooth truffle texture. If you do not own a food processor, do not worry. You can achieve excellent results by placing the Oreo cookies in a sturdy zip-top bag, sealing it, and using a rolling pin to crush them. Make sure to crush them thoroughly until they are as fine as possible for the best truffle texture.
For mixing the crumbs and cream cheese, a robust spoon or spatula works well by hand. If you have one, a hand mixer or a stand mixer with a paddle attachment can certainly make the combining process quicker and ensure a perfectly smooth mixture.
Troubleshooting Your White Chocolate Coating
Chocolate Too Thick or Seized? It is a common frustration when white chocolate coating becomes thick, clumpy, or grainy. This usually happens from overheating or introducing even a tiny drop of water into the chocolate. If your chocolate is too thick, you can often thin it out by stirring in 1/2 to 1 teaspoon of coconut oil or vegetable shortening until it reaches a smooth, fluid, dippable consistency. If your chocolate cools and thickens as you are dipping, reheat it very gently in short, 15-second bursts, stirring well each time.
Oreo Balls Falling Apart While Dipping? This is almost always due to insufficient chilling or an incorrect cream cheese-to-cookie ratio, usually too little cream cheese. This is precisely why the 15-Minute Flash-Freeze Technique is so critical. An extremely firm core will withstand the dipping process without crumbling. If your Oreo truffles start to soften during dipping, simply return them to the freezer for a few minutes to firm up again.
Pro Tips & Common Mistakes to Avoid
Pro Tips for Perfect Bunny Oreo Balls
- Achieve Ultra-Fine Crumbs: Remember to pulse your Oreo cookies into very fine, sand-like crumbs. This is an expert tip for a truly smooth, truffle-like texture and ensures easy binding.
- Master the Flash-Freeze: Seriously, embrace the 15-Minute Flash-Freeze Technique. It is the ultimate way to prevent chocolate pooling, ensure a perfectly smooth white chocolate coating, and secure your Candy Bunny Decorations flawlessly.
- Decorate Immediately: The white chocolate coating sets rapidly on the very cold truffle. Have all your decorations ready and apply them to each ball right after dipping.
- Use a Dipping Fork: A dipping fork or specialized candy tool helps you achieve an even, thin coating and allows excess chocolate to drip off cleanly, preventing thick, clumpy layers.
- Quality Melting Wafers: Always re-emphasize using high-quality confectionery coating or melting wafers. They offer a superior, fluid dipping consistency compared to standard chocolate chips.
- Professional Presentation: For a truly professional and festive Easter treats presentation, arrange your finished truffles on a platter of green-tinted coconut shreds to resemble grass.
Common Mistakes to Avoid
- Using Double-Stuffed Oreos: This is a common mistake. Double-stuffed Oreos have too much cream-to-cookie ratio, which results in a greasy, mushy ball that will not hold its shape well. Stick to regular Oreos.
- Skipping or Insufficient Chilling: Warm Oreo truffles will crumble, melt, or cause the white chocolate coating to become messy and difficult to work with. Always ensure adequate chilling, especially the flash-freeze step.
- Overheating White Chocolate: Be very careful not to overheat the white chocolate coating. Overheating causes it to seize and become thick, grainy, and completely unusable. Use gentle, controlled heat sources.
- Rushing Decorations: Do not try to dip and decorate too many balls at once. The chocolate will set before you can apply all the details. Work in small batches for the best results.
- Uneven Ball Size: Inconsistently sized Oreo truffles will chill and coat unevenly, affecting both their appearance and overall texture. Aim for uniformity.
Serving & Storage
Serving Ideas for Festive Occasions
These bunny oreo balls no bake are not just delicious, they are incredibly charming and perfect for any festive occasion. For a truly festive display, arrange them on a bed of edible Easter grass or shredded coconut to create a delightful, themed Easter treats scene. They are wonderful when incorporated into a larger Easter dessert charcuterie board alongside other no-bake dessert items. You can also package individual Oreo truffles in cellophane bags with a ribbon, making them excellent egg hunt prizes, party favors, or small homemade gifts. For a simple pairing, they are delightful with a cold glass of milk, a warm coffee, or a mug of hot chocolate.
Storage and Make-Ahead Tips
For optimal freshness and texture, finished Oreo truffles must be stored in an airtight container in the refrigerator. They will last for up to 2-3 weeks in the fridge, making them a fantastic make-ahead option. This recipe is excellent for preparing in advance for Easter treats or other events, as they store exceptionally well.
For longer storage, Oreo truffles can be frozen. Place them in an airtight container, layering with parchment paper between layers to prevent sticking, and freeze for up to 2-3 months. To thaw, simply transfer them to the refrigerator for a few hours or let them sit at room temperature for 15-30 minutes before serving. Due to the cream cheese content, Oreo truffles should not be left out at room temperature for more than 1-2 hours, especially in warmer environments. They are truly best when served chilled.
Conclusion
There you have it, my delightful recipe for bunny oreo balls no bake. These are incredibly easy, fun, and truly delightful treats that I love making and sharing. Remember, the game-changing 15-Minute Flash-Freeze Technique is your secret weapon for achieving perfectly coated, professional-looking Easter treats every single time. Even if you are a beginner in the kitchen, you can achieve impressive results with this foolproof no-bake dessert recipe. I encourage you to try the variations or serving ideas mentioned throughout this article to personalize your creations. Happy Easter, and I would love for you to share your Oreo truffles creations on social media or explore other related no-bake dessert recipes right here on my blog!
FAQ
Frequently Asked Questions About Bunny Oreo Balls
How do I store no-bake bunny Oreo balls and how long do they last?
Store your finished Oreo truffles in an airtight container in the refrigerator for up to 2-3 weeks. For longer storage, you can freeze them in an airtight container for up to 2-3 months, layered with parchment paper to prevent sticking.
Can I make these Oreo balls ahead of time for Easter?
Absolutely! This recipe is ideal for making ahead. You can prepare them completely and store them in the fridge or freezer until you are ready to serve, making Easter treats prep stress-free and enjoyable.
Why is my white chocolate too thick or clumpy when dipping?
This usually happens from overheating the white chocolate coating or accidentally introducing moisture. You can easily thin it out by stirring in 1/2 to 1 teaspoon of coconut oil or vegetable shortening until you achieve the desired smooth consistency.
Can I use a different type of cookie for this recipe?
Yes, you can! Golden Oreos work wonderfully for a vanilla-forward flavor profile, or you can use gluten-free chocolate sandwich cookies for a gluten-free version. You may need to adjust the cream cheese amount slightly if the cookie’s filling-to-cookie ratio differs significantly.
What is the best way to dip truffles without making a mess?
The best way is to use a dipping fork or a specialized candy dipping tool. Crucially, ensure your Oreo truffles are very cold – ideally, flash-frozen for 15 minutes – to help the chocolate set instantly, preventing excess drips and making the process much cleaner.
How long can Oreo balls sit out at room temperature?
Due to the cream cheese content, Oreo truffles should not be left at room temperature for more than 1-2 hours. Always store them in the refrigerator for food safety and to maintain their best quality.
Do I need to remove the cream filling from the Oreos first?
No, definitely not! The cream filling is a crucial component for binding the Oreo cookie crumbs and contributes significantly to the signature creamy texture of the Oreo truffles.
Easy Bunny Oreo Balls No Bake: The 15-Min Flash-Freeze Trick
Ingredients
Equipment
Method
- First, place all 36 Oreo cookies, cream filling included, into your food processor. Pulse them until they are transformed into very fine crumbs, almost resembling sand. If you do not have a food processor, you can place the cookies in a sturdy zip-top bag and crush them thoroughly with a rolling pin until uniformly fine.
- In a large mixing bowl, combine the fine cookie crumbs with your softened cream cheese. Mix thoroughly until everything is fully incorporated and there are no visible streaks of cream cheese. You can use a sturdy spoon, a stand mixer with a paddle attachment, or a hand mixer.
- Cover the bowl and refrigerate the mixture for 10 minutes. This brief chill makes the mixture firmer and much easier to handle.
- Once chilled, scoop the mixture into uniform 1-inch balls. A small cookie scoop works perfectly for consistent sizing. Place each ball onto a parchment paper-covered baking sheet.
- Refrigerate your rolled Oreo truffles for 20-30 minutes, or for the ultimate snap-set and perfect white chocolate coating, place the balls in the freezer for exactly 15 minutes. They will become extremely firm, which is critical for preventing crumbling when dipped.
- Gently melt your white chocolate melting wafers according to the package directions. Do not overheat the chocolate. Use a double boiler or short, controlled 15-30 second intervals in the microwave, stirring well after each burst.
- Using a dipping fork or a specialized candy tool, dip one Oreo truffle at a time into the melted white chocolate coating. Gently tap off any excess chocolate. Immediately place the coated truffle onto a fresh parchment-covered baking sheet and apply your Candy Bunny Decorations. Work efficiently on each individual truffle as the coating sets quickly.
- Refrigerate your decorated bunny oreo balls no bake until the white chocolate coating is fully set and firm. Then they are ready to serve and enjoy!