Picture this: a perfectly frothy latte, a silky smoothie, or a comforting bowl of cereal, all made with your very own homemade oat milk. Sounds heavenly, right? Yet, for many home cooks, the dream quickly sours into a slimy, disappointing reality. I’ve been there, staring into a blender full of what felt more like oat slime than luscious dairy-free milk. But what if I told you there’s a simple trick to unlock truly creamy, non-slimy homemade oat milk every single time?
This article isn’t just another recipe; it’s your comprehensive guide to mastering the art of homemade oat milk. Whether you’re a seasoned plant-based enthusiast or just dipping your toes into dairy-free alternatives, you’ll discover my foolproof method. We’ll dive deep into the science behind sliminess, explore why certain ingredients and techniques are essential, and arm you with all the knowledge to create the best plant-based milk in your kitchen.
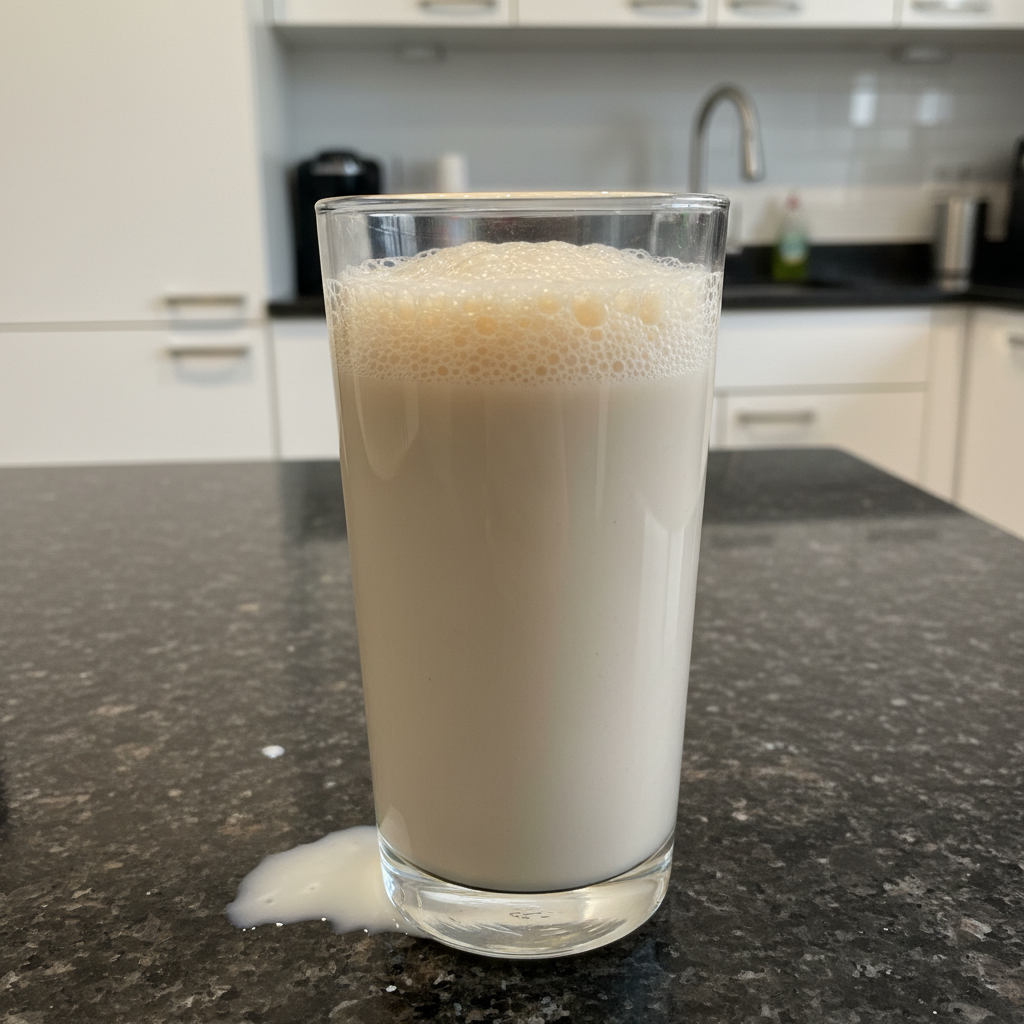
Why You’ll Love This Recipe
As a chef, I’ve experimented endlessly to perfect homemade oat milk. My secret weapon for achieving that coveted store-bought creaminess and preventing any hint of sliminess comes down to two key ingredients: sunflower lecithin and a neutral oil like avocado oil. This unique twist is a game-changer!
- Unparalleled Creaminess & No Sliminess: The addition of sunflower lecithin acts as a powerful emulsifier, stabilizing the fats and water in the milk. This not only prevents separation but, crucially, stops the starch from turning your beautiful milk into a slimy mess, especially when heated. The neutral avocado oil, on the other hand, contributes a rich, luscious mouthfeel, mimicking the beloved texture of premium commercial dairy-free milk brands.
- Cost-Effective: Let’s be honest, buying cartons of oat milk adds up quickly. Making your own at home drastically cuts down on weekly grocery bills, offering significant cost savings without sacrificing quality.
- Customizable: This recipe is your canvas. Adjust the sweetness with a date or maple syrup, add a touch of vanilla extract or cinnamon, or even a pinch of sea salt to enhance the flavors. You control every ingredient, ensuring your plant-based milk is exactly to your liking.
- Healthier & Cleaner: When you make homemade oat milk, you avoid the various gums, thickeners, and preservatives often found in store-bought versions. It’s a pure, vegan, and nut-free milk alternative, offering a clean, wholesome option for your family.
Ingredients Needed

Gather these simple ingredients to create your perfectly creamy homemade oat milk:
- 1 cup rolled oats, sprouted or regular (make sure they’re GF certified if needed)
- 4-6 cups chilled filtered water*
- 1 tsp vanilla extract
- 1 tsp sunflower lecithin
- 1 tbsp neutral oil (like avocado oil)
- Optional: 1 date, 1 tsp cinnamon
Ingredient Notes & Substitutions
- Rolled Oats: For the best homemade oat milk, I always reach for rolled oats. They provide the ideal balance of starch and fiber for a creamy texture without becoming too slimy. Quick oats are too finely processed and release starch too quickly, while steel-cut oats are too coarse and won’t blend into a smooth milk. If you have celiac disease or gluten sensitivity, it is absolutely essential to use certified gluten-free oats to prevent cross-contamination.
- Water: The asterisk next to the water quantity indicates flexibility. I recommend starting with 4 cups for a richer, creamier oat milk (perfect for coffee creamer or lattes) and increasing to 6 cups for a thinner consistency, ideal for cereals or lighter beverages. Always use chilled filtered water—it’s a crucial component in preventing sliminess!
- Vanilla Extract: A touch of vanilla extract adds a lovely warmth and depth to your plant-based milk. You can also experiment with other extracts like almond or peppermint for different flavor profiles.
- Sunflower Lecithin: This incredible ingredient is your secret weapon against sliminess and separation. As a natural emulsifier, sunflower lecithin helps blend the water and fats seamlessly, ensuring a smooth, stable, and non-slimy oat milk, especially when heated.
- Neutral Oil (Avocado Oil): A tablespoon of avocado oil (or another neutral oil like sunflower oil) significantly enhances the creamy texture of your homemade oat milk, making it comparable to the luxurious feel of store-bought versions. It adds richness without imparting any distinct flavor.
- Sweeteners: A single date adds natural sweetness and a hint of caramel. For a different taste, try maple syrup, agave nectar, or a few drops of liquid stevia.
- Cinnamon: A pinch of cinnamon adds a delightful spice, perfect for autumn-inspired drinks or simply to enjoy a spiced plant-based milk.
- Dairy-Free/Vegan: This recipe is naturally dairy-free milk and vegan, making it suitable for a wide range of dietary needs.

How to Make Homemade Oat Milk
Creating your own creamy, non-slimy oat milk is surprisingly simple when you follow these steps carefully. The key is in precision and understanding the role of each action.
Phase 1: Combine Ingredients for Blending
- In a large high-speed blender, add your rolled oats, chilled filtered water (starting with 4 cups for a thicker milk), vanilla extract, the crucial sunflower lecithin, and the avocado oil. If using, now is the time to add your optional date and cinnamon.
Phase 2: The Quick Blend
- Blend on high for only 30-40 seconds. Listen for the sound of the oats breaking down and watch as the creamy liquid forms. Any longer than that will over-process the oats, releasing too much starch and resulting in slimy oat milk. This short, precise blending technique is vital.
Phase 3: First Strain for Smoothness
- Set the blender aside. Drape a clean cheesecloth or a nut milk bag over a large bowl. Carefully pour the blended oat milk over the cloth to separate the liquid from the oat solids.
- Do not squeeze the cloth or nut milk bag! This is another critical step in preventing sliminess, as squeezing forces extra starch through the filter. Allow the liquid to drip naturally into the bowl. When it’s mostly dripped out, gently lift the cloth and discard or save the oat pulp for another recipe.
Phase 4: The Second Strain for Perfection
- Pour the oat milk back into the blender (no need to rinse the blender for this step). We’ll strain it one more time for an extra smooth, grit-free finish. Repeat Step 4 once more, using a fresh or rinsed cheesecloth or nut milk bag. This straining method ensures the best creamy texture.
Phase 5: Store and Enjoy
- Once double-strained, pour your beautiful homemade oat milk into a clean glass jar or airtight container that can be sealed and stored in the fridge.
- This oat milk will stay good for about 5 days in the fridge. You’ll know when it’s gone bad if it develops a sour smell or noticeably different odor from when you first made it.
Understanding Oat Milk Sliminess and How to Prevent It
The dreaded sliminess is the number one complaint about homemade oat milk. But once you understand the science, it’s easy to prevent. It all comes down to the oats’ natural composition and how we interact with it.
- The Science of Sliminess: Oats contain starches, specifically beta-glucans. When these starches are excessively broken down and agitated in warm water or over-blended, they release into the liquid and create a gelatinous, slimy texture, similar to a thickener. Additionally, some oat enzymes can further contribute to this degradation if conditions (like soaking) are not properly managed, accelerating the starch breakdown process. This process is known as starch gelation.
- Water Temperature is Key: Always, always use ice-cold water! Cold water helps to inhibit the rapid breakdown and release of starches from the oats. Think of it like cooking: you start with cold water for certain dishes to control the starch release; it’s the same principle here.
- Blending Time is Crucial: I cannot stress this enough: keep that blending time under 40 seconds. Any longer, and your high-speed blender will generate heat through friction and vigorously break down the oats’ cell walls, leading to excessive starch gelation. It’s a delicate balance to extract the creamy flavor without activating the sliminess. This optimal blending technique is a cornerstone of achieving perfect non-slimy texture.
- No Squeezing: When straining, resist the urge to squeeze the nut milk bag or cheesecloth. Squeezing forces finer starch particles through the filter, which directly contributes to a slimy, thicker consistency. Let gravity do the work!
Choosing the Right Oats and Strainer for Perfect Oat Milk
The quality of your homemade oat milk starts with the right ingredients and tools. Here’s a quick Oat Milk Ingredient & Tool Guide to set you up for success.
- Oat Types: As I mentioned, rolled oats are your best bet. Avoid quick oats; they’re pre-steamed and processed, making them prone to sliminess. Steel-cut oats are too minimally processed and won’t yield a smooth, creamy milk even with extended blending; they’ll simply remain gritty. Look for sprouted oats if you can find them, as they can sometimes offer enhanced digestibility and nutrient availability.
- Strainer Options:
- Nut Milk Bag: This is my top recommendation. Look for a fine mesh bag, typically 200-micron or finer, to catch all the oat particles while allowing the liquid to pass through freely. They are reusable and provide the smoothest finish.
- Cheesecloth: If using cheesecloth, choose a high-grade, unbleached cloth with at least 4-6 layers for effective straining. This will prevent grit.
- Fine-Mesh Sieve: While possible, a fine-mesh sieve alone often leaves some sediment. It’s best used in conjunction with a nut milk bag or cheesecloth for the clearest, creamiest result.
- Gluten-Free Oats: Just a friendly reminder: for those with gluten sensitivities or celiac disease, always opt for certified gluten-free oats. This ensures your dairy-free milk is safe for consumption.
Pro Tips & Troubleshooting
Pro Tips
- Use Ice-Cold Water: Always start with chilled filtered water to minimize starch release and prevent sliminess.
- Blend Briefly: Keep your blending time to a strict 30-40 seconds. Over-blending is the enemy of creamy oat milk.
- Do Not Squeeze the Nut Milk Bag: Let the liquid drain naturally to avoid pushing starches through the strainer.
- Double Strain: A second strain ensures an incredibly smooth, grit-free texture, just like your favorite store-bought brand.
- Store Properly: Keep your homemade oat milk in a sealed glass jar or airtight container in the fridge.
- Shake Before Using: Natural separation is normal. A quick shake will reintegrate everything into a creamy consistency.
- Embrace the Twist: Don’t skip the sunflower lecithin and neutral avocado oil! These are the secrets to ultimate creaminess and guaranteed non-slimy oat milk.
Common Mistakes to Avoid
- Soaking the Oats: This is a common misconception! Soaking oats before blending actually *promotes* sliminess by allowing starches to hydrate and enzymes to activate.
- Using Warm Water: Warm water accelerates starch release, leading to a slimy texture.
- Over-Blending: Blending for too long generates heat and pulverizes the oats too much, causing sliminess.
- Squeezing the Nut Bag: This forces starch particles through your filter, resulting in a less smooth and often slimy milk.
- Not Using a Fine-Enough Strainer: A coarse strainer will leave you with gritty oat milk.
- Using the Wrong Type of Oats: Quick oats or steel-cut oats will not yield the desired creamy, non-slimy oat milk. Stick to rolled oats.
Serving & Storage
Serving Ideas
Your beautiful homemade oat milk is incredibly versatile! Here are some of my favorite ways to enjoy it:
- Smoothies: The ultimate base for any smoothies. Blend with frozen fruit, spinach, and a scoop of protein powder for a nourishing meal or snack.
- Coffee Creamer: Thanks to the sunflower lecithin and avocado oil, this oat milk makes an exceptional coffee creamer, frothing beautifully for lattes and cappuccinos. Try it in your herbal coffee for a rich, dairy-free treat!
- Baking: Use it as a 1:1 substitute for dairy milk in your favorite baking recipes. It’s fantastic in vegan cakes, muffins, and quick breads.
- Creamy Soups: Incorporate it into savory dishes for added creaminess without dairy. A splash in a vegan gnocchi soup or a creamy tomato soup is divine.
- Drinking Straight Up: Sometimes, the simplest way is the best. Enjoy a cold glass on its own, perhaps with a sprinkle of cinnamon.
Storage and Make-Ahead
- Refrigerator: Your homemade oat milk will last up to 5 days in a sealed glass jar or airtight container in the refrigerator. You’ll know it’s gone bad if it smells sour, tastes off, or has a significantly altered consistency.
- Freezing: While technically possible, I generally don’t recommend freezing homemade oat milk. The texture can change significantly upon thawing, often becoming grainy or separating due to the water content expanding and contracting. If you must freeze, consider using it in recipes where texture isn’t paramount, like smoothies or baking recipes. Freeze in ice cube trays for convenient portioning.
- Reheating: Warming homemade oat milk can sometimes cause it to become slightly slimy due to the activation of starches by heat. However, with the sunflower lecithin and avocado oil in this recipe, it’s far more stable. To prevent any issues, warm it gently over low heat, stirring continuously, and avoid bringing it to a rolling boil.
Conclusion
You now have all the tools and knowledge to create truly delicious, creamy, and non-slimy oat milk right in your own kitchen! By embracing the simple power of sunflower lecithin and neutral oil, you’ve unlocked a secret that elevates your homemade oat milk from good to absolutely exceptional. It’s a recipe that not only saves money but also puts you in control of every wholesome ingredient.
Don’t be intimidated; this recipe is straightforward and forgiving, even for beginners. Experiment with a touch of vegan chocolate for a rich treat, or explore different extracts to personalize your batches. Your culinary adventures with this plant-based milk are just beginning!
I encourage you to try this game-changing recipe for homemade oat milk. When you whip up your next batch, share your creations on social media and tag me!
FAQ
Why is my homemade oat milk slimy, and how can I prevent it?
Sliminess in homemade oat milk is typically caused by over-blending, using warm water, or squeezing the nut milk bag. These actions release too much starch from the oats, leading to a gelatinous texture. To prevent it, use ice-cold water, blend for no more than 30-40 seconds, avoid soaking your oats, do not squeeze the strainer, and incorporate sunflower lecithin and avocado oil for superior emulsification and creamy texture.
Is it more cost-effective to make oat milk at home?
Yes, absolutely! Making homemade oat milk is significantly more cost-effective than buying store-bought versions. A carton of oat milk can range from $3-5, while a bag of rolled oats (which yields multiple batches) is usually under $5. The small additions of sunflower lecithin and avocado oil add minimal cost but provide immense benefits, resulting in substantial cost savings over time.
What are the best uses for homemade oat milk?
Homemade oat milk is incredibly versatile! It’s perfect for smoothies, as a coffee creamer in lattes, in baking recipes (like vegan cakes and muffins), added to creamy soups, or simply enjoyed on its own. Its neutral flavor and creamy texture make it an excellent dairy-free milk substitute in most applications.
How long does homemade oat milk last in the refrigerator?
Your homemade oat milk will typically last for about 5 days when stored in a sealed glass jar or airtight container in the refrigerator. Signs of spoilage include a sour smell, an off-taste, or a noticeably thickened or separated texture that doesn’t recombine with shaking.
What are the essential ingredients and equipment for making oat milk?
The essential ingredients for this creamy homemade oat milk are rolled oats, chilled filtered water, sunflower lecithin, and a neutral oil like avocado oil. For equipment, you’ll need a high-speed blender and a fine-mesh nut milk bag or several layers of cheesecloth for straining. A glass jar or airtight container for storage is also essential.
Can I use different types of oats or make oat milk without a blender?
For the best creamy texture and to avoid sliminess, rolled oats are highly recommended. Quick oats and steel-cut oats are not ideal for different reasons (over-processing and grittiness, respectively). While you can strain with a fine-mesh sieve in a pinch, a nut milk bag or cheesecloth provides a much smoother result. A powerful blender is essential for breaking down the oats quickly and effectively without over-processing.
What can I use leftover oat pulp for?
Don’t waste that oat pulp! It’s a fantastic ingredient for boosting fiber in other recipes. You can add it to your morning oatmeal, mix it into baking recipes like muffins, cookies, or bread, or even incorporate it into homemade granola bars. Some people also use it in savory dishes like veggie burgers or as a binder.
Does homemade oat milk separate in the fridge, and is that normal?
Yes, natural separation of homemade oat milk in the fridge is completely normal. The heavier oat particles and some of the fats may settle at the bottom over time. This is why I always recommend giving your oat milk a good shake before each use to reintegrate everything and restore its creamy consistency.
Creamy Homemade Oat Milk: No Sliminess, Guaranteed!
Ingredients
Equipment
Method
- In a large high-speed blender, add your rolled oats, chilled filtered water (starting with 4 cups for a thicker milk), vanilla extract, the crucial sunflower lecithin, and the avocado oil. If using, now is the time to add your optional date and cinnamon.
- Blend on high for only 30-40 seconds. Listen for the sound of the oats breaking down and watch as the creamy liquid forms. Any longer than that will over-process the oats, releasing too much starch and resulting in slimy oat milk.
- Set the blender aside. Drape a clean cheesecloth or a nut milk bag over a large bowl. Carefully pour the blended oat milk over the cloth to separate the liquid from the oat solids.
- Do not squeeze the cloth or nut milk bag! This is another critical step in preventing sliminess, as squeezing forces extra starch through the filter. Allow the liquid to drip naturally into the bowl. When it's mostly dripped out, gently lift the cloth and discard or save the oat pulp for another recipe.
- Pour the oat milk back into the blender (no need to rinse the blender for this step). We'll strain it one more time for an extra smooth, grit-free finish. Repeat Step 4 once more, using a fresh or rinsed cheesecloth or nut milk bag. This straining method ensures the best creamy texture.
- Once double-strained, pour your beautiful homemade oat milk into a clean glass jar or airtight container that can be sealed and stored in the fridge.
- This oat milk will stay good for about 5 days in the fridge. You'll know when it's gone bad if it develops a sour smell or noticeably different odor from when you first made it.